Stride Community Toolkit Preview - Code-Only Feature Basics in C# - Bullet Physics
Discover the Stride Community Toolkit, a powerful collection of extensions and helpers designed for the Stride game engine. In this blog post (Bullet Physics version), we dive into the toolkit's code-only feature, empowering C# and .NET developers to create immersive 2D/3D games and visualizations with ease. Explore how this community-driven, open-source project can simplify your game development journey.
This blog post is part 1 of a 3-part series:
- Stride Community Toolkit Preview - Code-Only Feature - Basics (C#)
- Bepu Physics version
- Also available: Condensed F# version of this tutorial
- The Visual Basic version is also possible but I am running out of space here 😅
- Stride Community Toolkit Preview - Code-Only Feature - Advanced
- Stride Community Toolkit Preview - Code-Only Feature - Refactoring
Table of Contents:
- Introduction 🌱
- What You'll Learn 🎯
- Basic Terminology 📚
- Prerequisites 🏠
- How to use the code snippets 📝
- Code-Only on Windows 🪟
- Code-Only on Other Platforms 🐧
- The Story of the Brave Explorers 📘
- Step 1: Create a New C# .NET 10 Console App - Nothingness ⚫
- Step 2: Let There Be Light - Or at Least Blue 🌌
- Step 3: Add Some Shapes - Capsule Time! 🎨
- Step 4: Control the Camera - Look Around! 🖱️
- Step 5: Reposition the Capsule - More Excitement! 📍
- Step 6: Add a Ground - Catch the Capsule! 🛑
- Step 7: Illuminate the Scene - Add Light! 💡
- Step 8: Break 1 - Let's Reflect 😅
- Step 9: Add Profiler - Performance! 📈
- Step 10: Illuminate the Scene - Add Skybox! 🌇
- Step 11: Add Motion - I like to Move It, Move It! 🕺
- Step 12: Add Motion without Physics - Move the Cube without Colliders 📦
- Step 13: Add Motion with Physics - Move the Cube with Colliders! 🧊
- Step 14: Add Keyboard Interaction - Move the Cube! ⌨️
- Step 15: Add Mouse Interaction - Do something! 🖱️
- Step 16: Add Output - Console or Screen! 📺
- Step 17: Break 2 - Let's Reflect 😅
- Step 18: Add More Primitives - Let's go crazy! 🤪
- Wrapping Up: Your Journey Continues 🎯
- Follow-Up Articles 🚶
- Support Stride Engine 🌟
Introduction 🌱 🔗
Welcome to the preview of the Stride Community Toolkit, a collection of extensions and helpers for the Stride C# game engine. This community-driven, open-source project is designed to assist developers in creating 2D/3D games and visualizations using Stride.
Although the toolkit is still in its early stages, it already offers several valuable features. In this post, I will focus on the code-only approach, which I found particularly useful for development.
This article assumes that you have some experience with .NET and C# programming.
The toolkit allows you to create a game using a code-only approach, meaning you can develop a game without relying on the Stride Game Studio. As a C#/.NET developer in my day job, I found this approach very helpful for getting started with the Stride engine and game development, bypassing the need to work directly in the Game Studio.
You can also access the full source code for this post on GitHub to follow along or explore the final implementation directly.
Additional details on the benefits of the code-only approach can be found here in the toolkit documentation.
We will be using a standard .NET 10 Console App to create a simple game by adding some NuGet packages to get started.
Here’s the process I found to be the easiest way to begin with the code-only approach:
- Run the minimal code to get the game window running
- Add entities/primitives to the scene
- Add interaction with the keyboard and mouse
- Add output to the console or screen
- Play around, be creative and have fun
What You'll Learn 🎯 🔗
By the end of this post, you will have a solid foundation in using the Stride Community Toolkit's code-only feature to create a simple game. You’ll learn how to:
- Set up the game window and initialize the core components
- Add and manipulate entities within the scene
- Implement basic interactivity using the keyboard and mouse
- Display text output to the console or directly on the screen for debugging or player feedback
Coding enhances creativity and problem-solving, and we can take that creativity to the next level through visualization, whether it's in games, simulations, or simply experimenting with 3D models in a virtual space.
Whether you’re a seasoned developer or new to game development, this post will guide you through the essential steps to get your first game up and running with Stride. Ready to dive in? Let’s get started! 🚀
Basic Terminology 📚 🔗
Before diving into the steps, it's helpful to understand some key terms that will be used throughout this guide:
- Stride: A C# game engine for creating 2D/3D games and visualizations.
- Stride Community Toolkit: A collection of extensions and helpers for the Stride engine.
- Bepu Physics: The preferred physics engine for Stride, providing advanced Bepu physics simulation capabilities.
- Bullet Physics: An alternative physics engine for Stride, which is being phased out in favor of Bepu Physics.
- Code-Only: A feature of the toolkit that allows you to create a game without using the Game Studio.
- Game: In the context of this post, a game refers to any interactive or visual project created using a game engine. This can range from traditional playable games to simulations, visualizations, or any real-time interactive experiences where users can interact with or observe elements within a scene.
- Scene: The container for entities, which defines the game world or environment.
- Entity: An object in the scene that can represent anything from a 3D model to a camera or light and aggregates multiple EntityComponents.
- EntityComponent: A base component that defines the behavior or properties of an entity. Other components inherit from this class.
- RigidbodyComponent: A physics component that allows an entity to respond to forces like gravity and collisions.
- Graphics Compositor: A component that organizes how scenes are rendered in the Stride engine.
- Camera: A camera that allows viewing the scene from different angles.
- Camera Controller: A script that enables basic camera movement using keyboard and mouse inputs.
- 3D Primitive: A basic 3D model, such as a capsule, cube, or sphere.
- Collider: A component that defines the shape of an entity for physical interactions.
- Physics Engine: A system that simulates physical interactions between entities in the scene.
- Profiler: A tool that monitors performance metrics like frames per second (FPS) and memory usage.
- Skybox: A textured 3D model that provides a background for the scene.
- Game Loop: The main loop that drives the game, updating the state and rendering the scene.
- Update Method: A callback method that is called every frame to update the game state.
- Physics-Based Movement: Moving entities using the physics engine to simulate realistic interactions.
- Non-Physical Movement: Moving entities by directly changing their position without physics interactions.
- Transform: Defines an entity's position, rotation, and scale in the scene.
- Force: A vector that represents a physical force applied to an entity.
- Delta Time: The time elapsed between frames, used for frame-independent movement.
- Material: A visual property that defines how an entity is rendered, including color, texture, and shading.
- Ground Gizmo: A visual representation of the ground plane and axis directions in the scene.
- GameTime: A structure that provides time-related information for the game loop.
- Vector3: A 3D vector that represents a point or direction in 3D space.
- Frame Rate: The number of frames rendered per second, measured in frames per second (FPS).
Prerequisites 🏠 🔗
These prerequisites were tested on a clean Windows 11 installation.
- Install the Microsoft Visual C++ v14 Redistributable (x64) (approximately 19MB) and restart your system if prompted.
- Install the .NET 10 SDK x64 (around 215MB).
- Install the IDE of your choice. I will be using Visual Studio 2026 (the Community version is free), but you can also use:
- Visual Studio Code - Free
- Rider - Free for non-commercial use
- Any other IDE that supports .NET development
How to use the code snippets 📝 🔗
You can copy and paste the code into your Program.cs file and run the application to see the results.
You will be guided to replace some parts of the code with the new code snippets as you progress through the steps or replacing the entire Program.cs file.
Also, the code snippets contain comments which part of the code is new or updated.
Code-Only on Windows 🪟 🔗
The code-only approach is currently available only on Windows. The toolkit provides a set of NuGet packages that you can use to create a game without the need for the Game Studio.
Code-Only on Other Platforms 🐧 🔗
Code-only development isn't fully supported on non-Windows platforms yet, but progress is being made. Thanks to this PR, the build tool Stride.Core.Assets.CompilerApp, which is responsible for building assets, now works on Linux as a cross-platform binary.
However, there are still some limitations. A known workaround for Linux (Ubuntu) is documented here: Code-Only Development on Linux (Ubuntu) Requires Manual File Copying.
While Stride is a cross-platform engine and you can build your game on Windows and run it elsewhere, full support for code-only workflows on platforms like Linux is still evolving.
The Story of the Brave Explorers 📘 🔗
🌍 Welcome, brave explorers of the digital wilderness! Today, we embark on an exciting journey into the heart of the Stride game engine. Our guide? None other than the Stride Community Toolkit.
In the vast expanse of the coding universe, we'll create a new world from nothing but a .NET 10 Console App. Prepare to witness the birth of a game window, a black void of nothingness that will soon teem with life 🫎.
As we venture further, we'll bring light into our world, transforming the empty void into a vibrant blue expanse. But what's a world without inhabitants? We'll conjure a 3D capsule, our first digital lifeform, into existence.
Beware, fellow adventurers! Our capsule is a wild creature, prone to falling into the void. But fear not, for we'll harness the power of a 3D camera 🎥 controller to keep a watchful eye 👁️ on our creation.
As we continue, we'll introduce motion, allowing our entities to interact with their surroundings and respond to player input. From keyboard controls to mouse interactions, our world will come to life with movement and action. 🕹️
Finally, we’ll display messages and feedback with both console output and on-screen text, letting our creation communicate with us through the game window. 📝
So, refresh your mouse agility skills 🖱️, and join us on this exhilarating expedition. Let's dive into the code! 💻
Step 1: Create a New C# .NET 10 Console App - Nothingness ⚫ 🔗
- Create a new C# .NET 10 Console App in your IDE or use the command line:
dotnet new console --framework net10.0 --name YourProjectName - Add the following NuGet package: 📦
dotnet add package Stride.CommunityToolkit.Windows --prerelease - Paste the following code into your
Program.csfile: 💻using Stride.Engine; // Create an instance of the game using var game = new Game(); // Start the game loop // This method initializes the game, begins running the game loop, // and starts processing events. game.Run(); - Build the project from the command line or use your IDE to build it:
dotnet build - Run the application.
- Behold the black void of nothingness 🙀.
--version 1.0.0-preview.61 instead of --prerelease, which targets Stride 4.3. This applies to all NuGet packages mentioned below.Stride.CommunityToolkit.Windows is used specifically for code-only projects. You should use the Stride.CommunityToolkit NuGet package when referencing from a regular Stride project generated from the Game Studio.Step 2: Let There Be Light - Or at Least Blue 🌌 🔗
Once upon a time in a galaxy far, far away, you should see a window with a black background. This is the Stride game window. 🖥️ As a black screen is not very exciting, let's add some mystery code to make it more interesting. This time, we use the Stride.CommunityToolkit.Engine namespace so we can reference some of the toolkit helper methods. 🔧✨
Update the Program.cs file to look like this, or simply replace the entire file:
using Stride.CommunityToolkit.Engine; // This was added: Import the toolkit's helper methods
using Stride.Engine;

// Create an instance of the game
using var game = new Game();

// Start the game loop and provide the Start method as a callback
// This method initializes the game, begins running the game loop,
// and starts processing events.
game.Run(start: Start);  // This was updated

// This was added
// Define the Start method to set up the scene
void Start(Scene scene)
{
    // Add the default graphics compositor to handle rendering
    game.AddGraphicsCompositor();

    // Add a 3D camera to the scene to allow viewing from different angles
    game.Add3DCamera();
}
The code above does the following:
Start()method is a callback that is invoked when the game starts. It takes aSceneobject as a parameter, representing the root scene of the game.AddGraphicsCompositor()organizes how scenes are rendered in the Stride engine, enabling extensive customization of the rendering pipeline.Add3DCamera()adds a 3D camera to the scene, allowing you to view it from various angles.
Run the application again. Now, instead of a black screen, you should see a blue screen. 🌌 While not overly exciting, it’s a step in the right direction. We’re looking through the camera, but there’s nothing to see yet. 👀
Step 3: Add Some Shapes - Capsule Time! 🎨 🔗
Firstly, we need to add another NuGet package, Stride.CommunityToolkit.Bullet, which includes the Bullet physics engine. This package is required for the physics engine to work properly. You can add it using the following command:
dotnet add package Stride.CommunityToolkit.Bullet --prereleaseNow let's add something to the scene. 🎨 This time, we will be utilizing the Stride.CommunityToolkit.Rendering.ProceduralModels namespace, which provides helper methods for generating procedural models like capsules, cubes, and spheres. We will add a capsule to the scene.
Update the Program.cs file to look like this, or simply replace the entire file:
using Stride.CommunityToolkit.Bullet; // This was added: Import the Bullet physics engine
using Stride.CommunityToolkit.Engine;
using Stride.CommunityToolkit.Rendering.ProceduralModels;  // This was added: Import procedural model helpers
using Stride.Engine;

// Create an instance of the game
using var game = new Game();

// Start the game loop and provide the Start method as a callback
// This method initializes the game, begins running the game loop,
// and starts processing events.
game.Run(start: Start);

// Define the Start method to set up the scene
void Start(Scene scene)
{
    // Add the default graphics compositor to handle rendering
    game.AddGraphicsCompositor();

    // Add a 3D camera to the scene to allow viewing from different angles
    game.Add3DCamera();

    // Create a 3D primitive capsule and store it in an entity
    var entity = game.Create3DPrimitive(PrimitiveModelType.Capsule); // This was added
}
In this step, we added a new line that creates a 3D primitive capsule. 🧊 The Create3DPrimitive() method takes a PrimitiveModelType enum as a parameter and returns an Entity object, with a collider included by default. The PrimitiveModelType enum defines the types of primitive 3D models that can be generated, such as capsules, cubes, and spheres.
Run the application again. Surprise, nothing happened! 😲🤬 We created an entity, but we didn't add it to the scene. This is a typical beginner's mistake 🤦♂️. To fix it, update the Start() method to look like this.
You can replace the entire Start() method with the code below:
// Define the Start method to set up the scene
void Start(Scene scene)
{
// Add the default graphics compositor to handle rendering
game.AddGraphicsCompositor();
// Add a 3D camera to the scene to allow viewing from different angles
game.Add3DCamera();
// Create a 3D primitive capsule and store it in an entity
var entity = game.Create3DPrimitive(PrimitiveModelType.Capsule);
// Add the entity to the root scene so it becomes part of the scene graph
entity.Scene = scene; // This was added
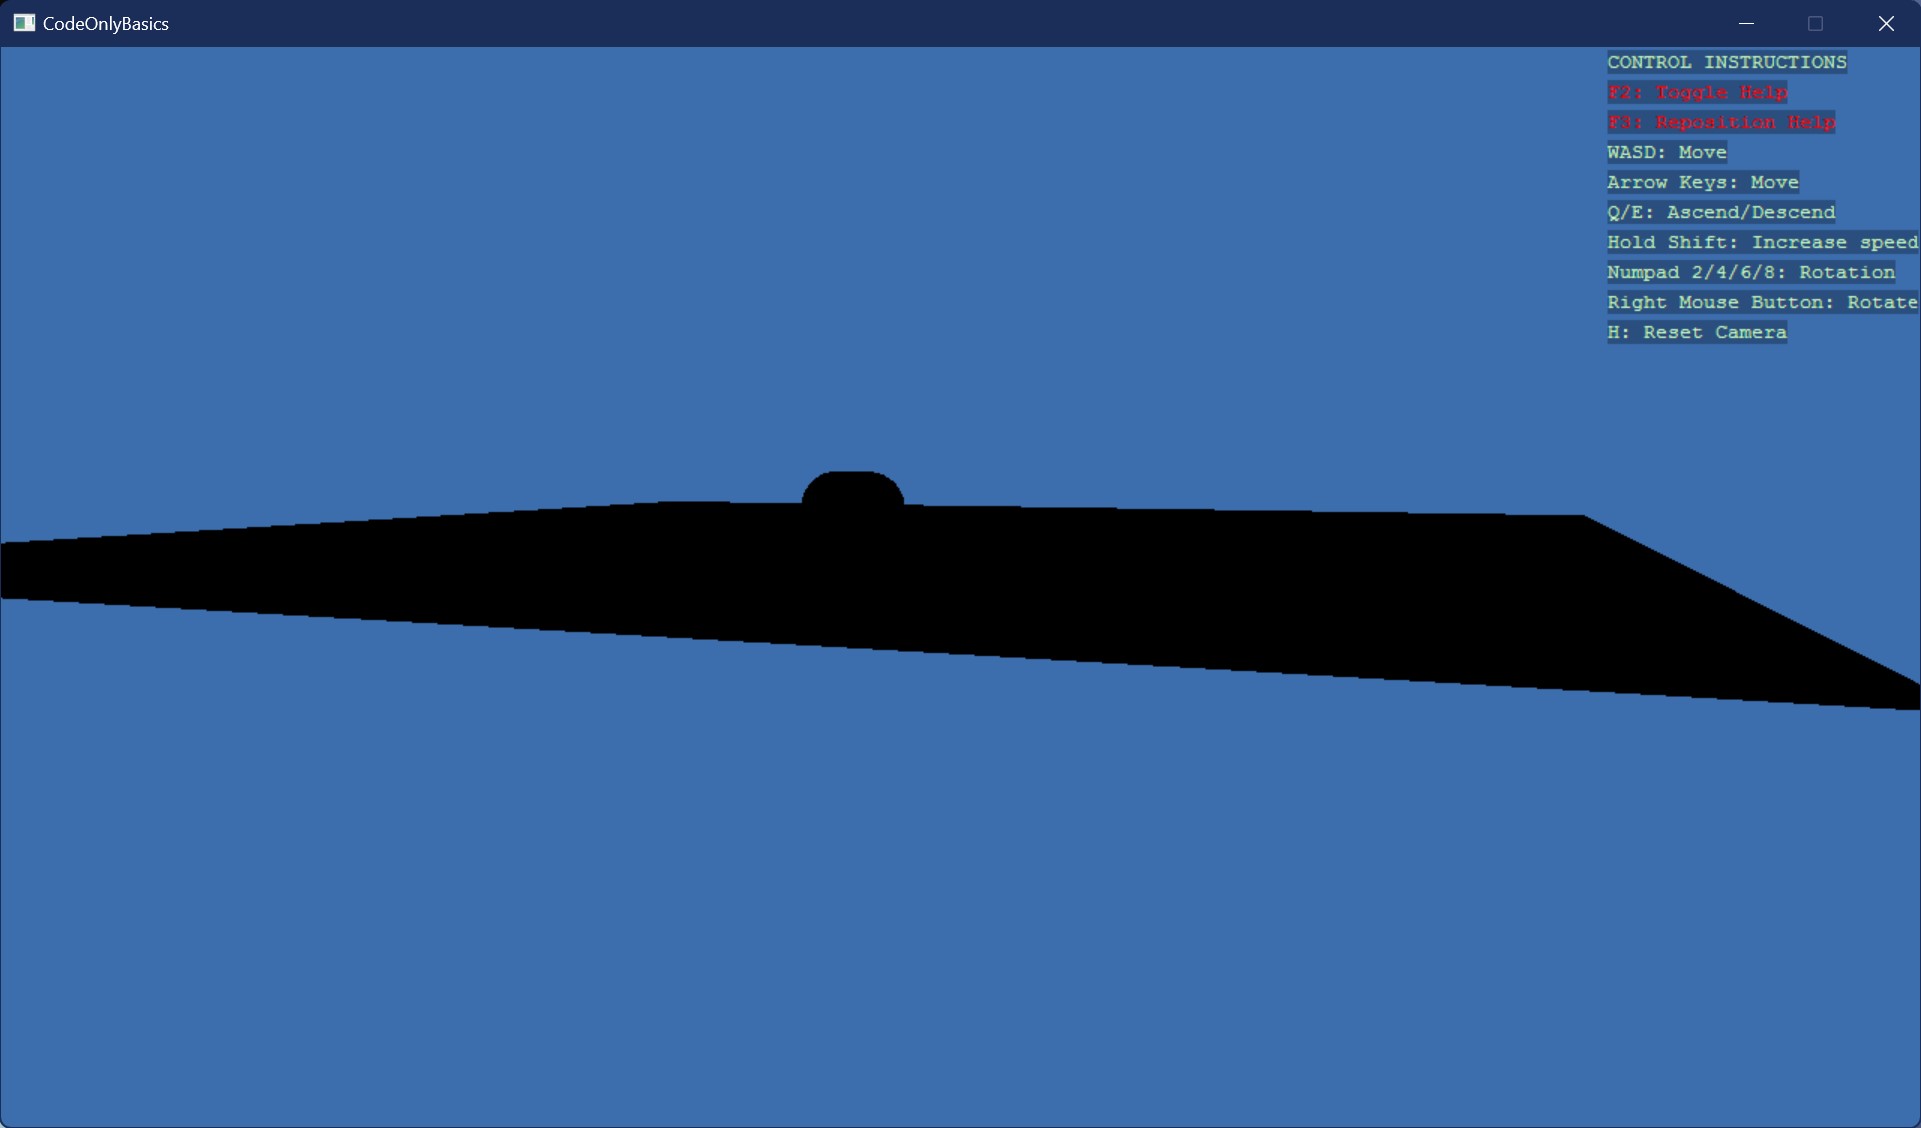
}Now, run the application again. You should see a capsule in the middle of the screen if you're lucky because it's falling down. Fast! 🚀
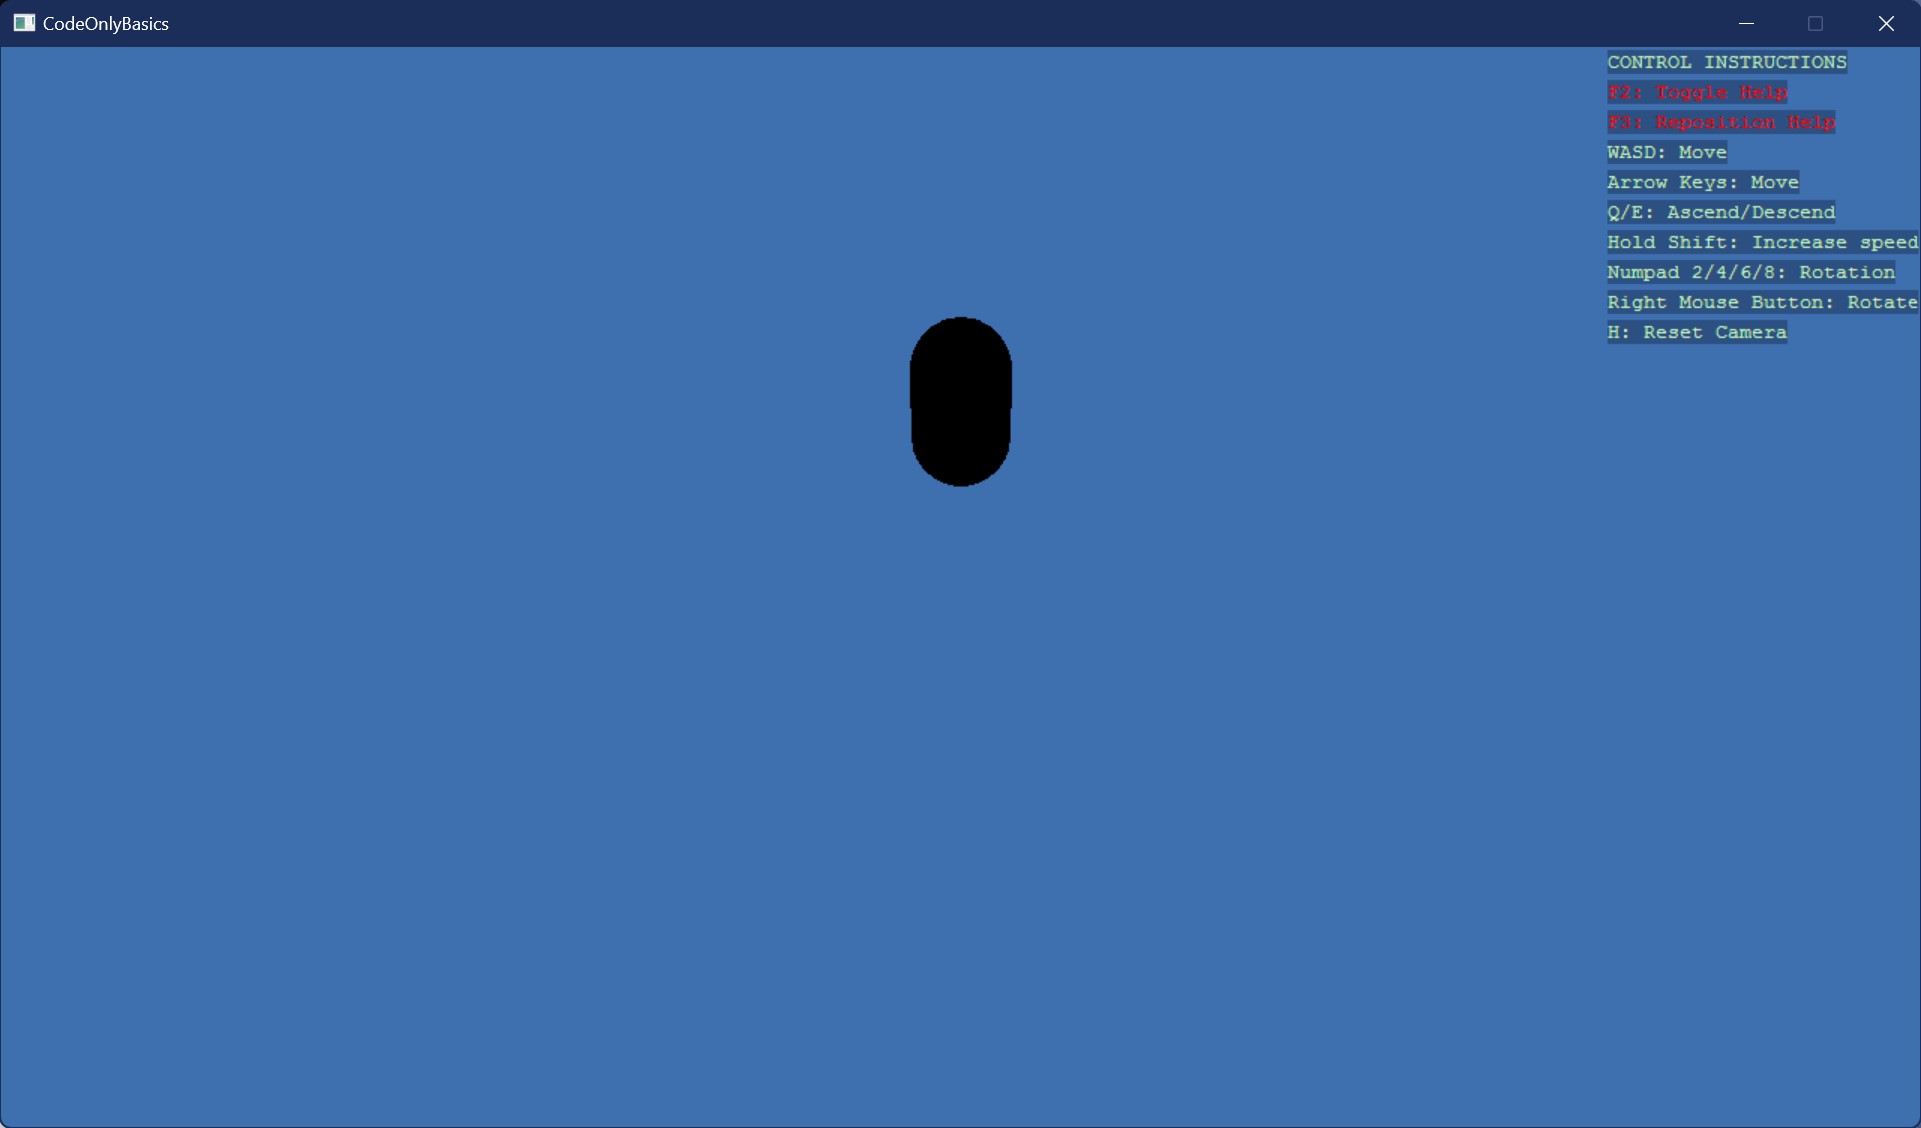
Step 4: Control the Camera - Look Around! 🖱️ 🔗
Maybe we should at least look around the scene and view the capsule from different angles as it falls into the void 🤔?
Let's add a 3D camera controller using the Add3DCameraController() method. 🎮 This extension adds basic camera functionality, allowing you to interact with the camera through keyboard and mouse inputs. Specifically, it attaches a regular SyncScript to the camera with custom logic to handle camera movement.
In most games, you would implement your own custom camera logic to fit the specific needs of your game. However, for this example, we'll use the default camera controller to get basic camera movement up and running quickly.
Time to refresh those mouse agility skills!
// This was updated: Add a camera controller for basic camera movement
game.Add3DCamera().Add3DCameraController();
Run the application again and use right-click and hold to rotate the camera towards the capsule, or follow the instructions displayed on the screen. 🎥 Feeling a bit more satisfied now? Let’s make the experience even more interesting! 🎨✨
Step 5: Reposition the Capsule - More Excitement! 📍 🔗
Let's reposition the capsule to add a bit more excitement and give us a few extra seconds to admire it before it falls. Update the Start() method as shown below, and don't forget to add the Stride.Core.Mathematics namespace for handling the 3D positioning.
Stride.Core.Mathematics is used instead of System.Numerics which also contains Vector3.Update the Program.cs file to look like this, or simply replace the entire file:
using Stride.CommunityToolkit.Bullet;
using Stride.CommunityToolkit.Engine;
using Stride.CommunityToolkit.Rendering.ProceduralModels;
using Stride.Core.Mathematics;  // This was added: Import Vector3 and other math utilities
using Stride.Engine;

// Create an instance of the game
using var game = new Game();

// Start the game loop and provide the Start method as a callback
// This method initializes the game, begins running the game loop,
// and starts processing events.
game.Run(start: Start);

// Define the Start method to set up the scene
void Start(Scene scene)
{
    // Add the default graphics compositor to handle rendering
    game.AddGraphicsCompositor();

    // Add a 3D camera and a controller for basic camera movement
    game.Add3DCamera().Add3DCameraController();

    // Create a 3D primitive capsule and store it in an entity
    var entity = game.Create3DPrimitive(PrimitiveModelType.Capsule);

    // Reposition the capsule 8 units above the origin in the scene
    entity.Transform.Position = new Vector3(0, 8, 0); // This was added

    // Add the entity to the root scene so it becomes part of the scene graph
    entity.Scene = scene;
}entity.Transform.Positionsets the position of the entity within the scene. TheVector3object represents a 3D vector, which in this case, places the capsule at coordinates(0, 8, 0), which is 8 units above the scene's origin.Stride.Core.MathematicsStride uses its own implementation ofVector3and other math utilities, so we need to add this namespace to access those features.
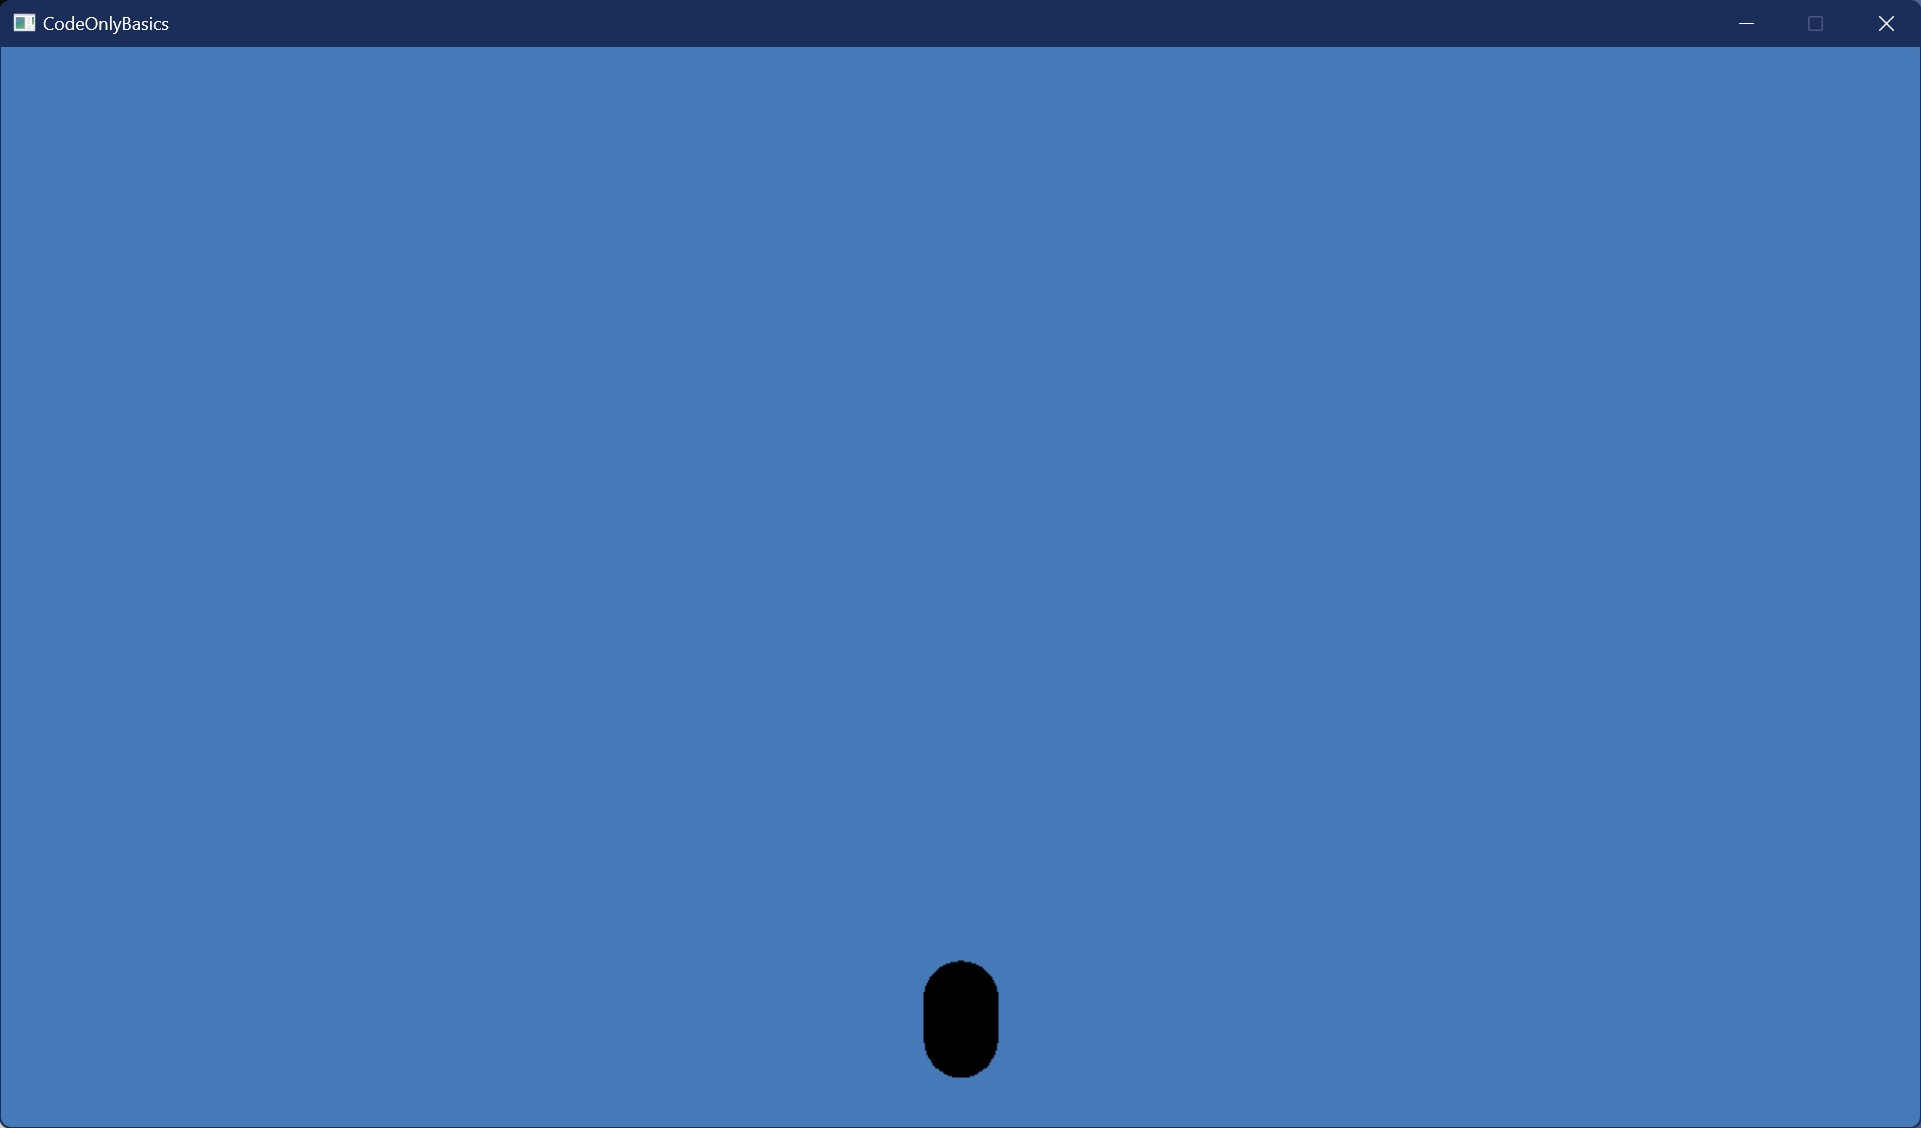
Run the application again. You should see a capsule falling down from the top of the screen. I know, the capsule is black, but don't worry, we'll fix that later. 😉
Transform component's Position property. The capsule is now positioned 8 units above the origin, giving you more time to admire it as it falls into the void.Step 6: Add a Ground - Catch the Capsule! 🛑 🔗
Now let's catch the capsule by adding some ground to the scene. Update the Start() method to look like this so we can feel more grounded.
You can replace the entire Start() method with the code below:
// Define the Start method to set up the scene
void Start(Scene scene)
{
    // Add the default graphics compositor to handle rendering
    game.AddGraphicsCompositor();

    // Add a 3D camera and a controller for basic camera movement
    game.Add3DCamera().Add3DCameraController();

    // Add a 3D ground plane to catch the capsule
    game.Add3DGround(); // This was added

    // Create a 3D primitive capsule and store it in an entity
    var entity = game.Create3DPrimitive(PrimitiveModelType.Capsule);

    // Reposition the capsule 8 units above the origin in the scene
    entity.Transform.Position = new Vector3(0, 8, 0);

    // Add the entity to the root scene so it becomes part of the scene graph
    entity.Scene = scene;
}Add3DGround()is a toolkit helper method that creates a 3D ground plane in the scene, providing a surface for the capsule to land on.
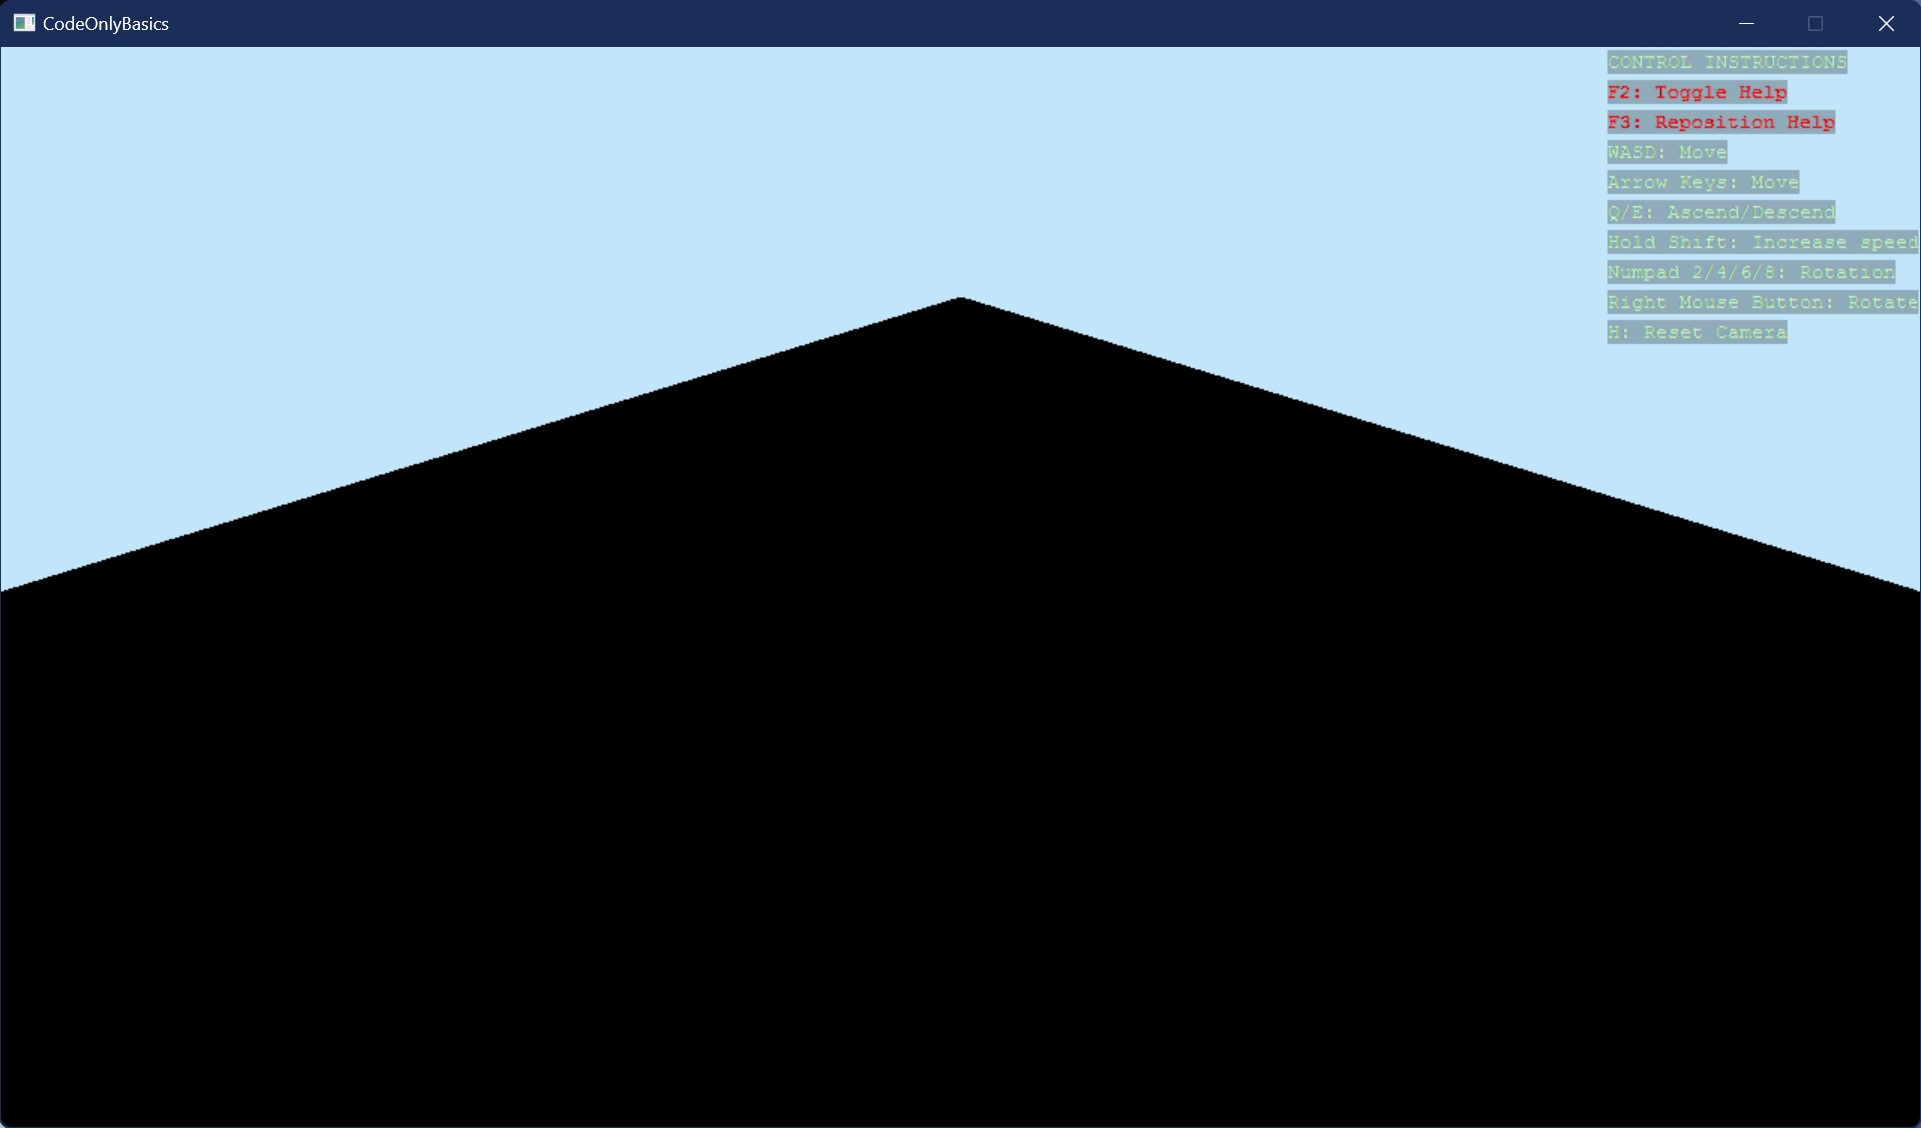
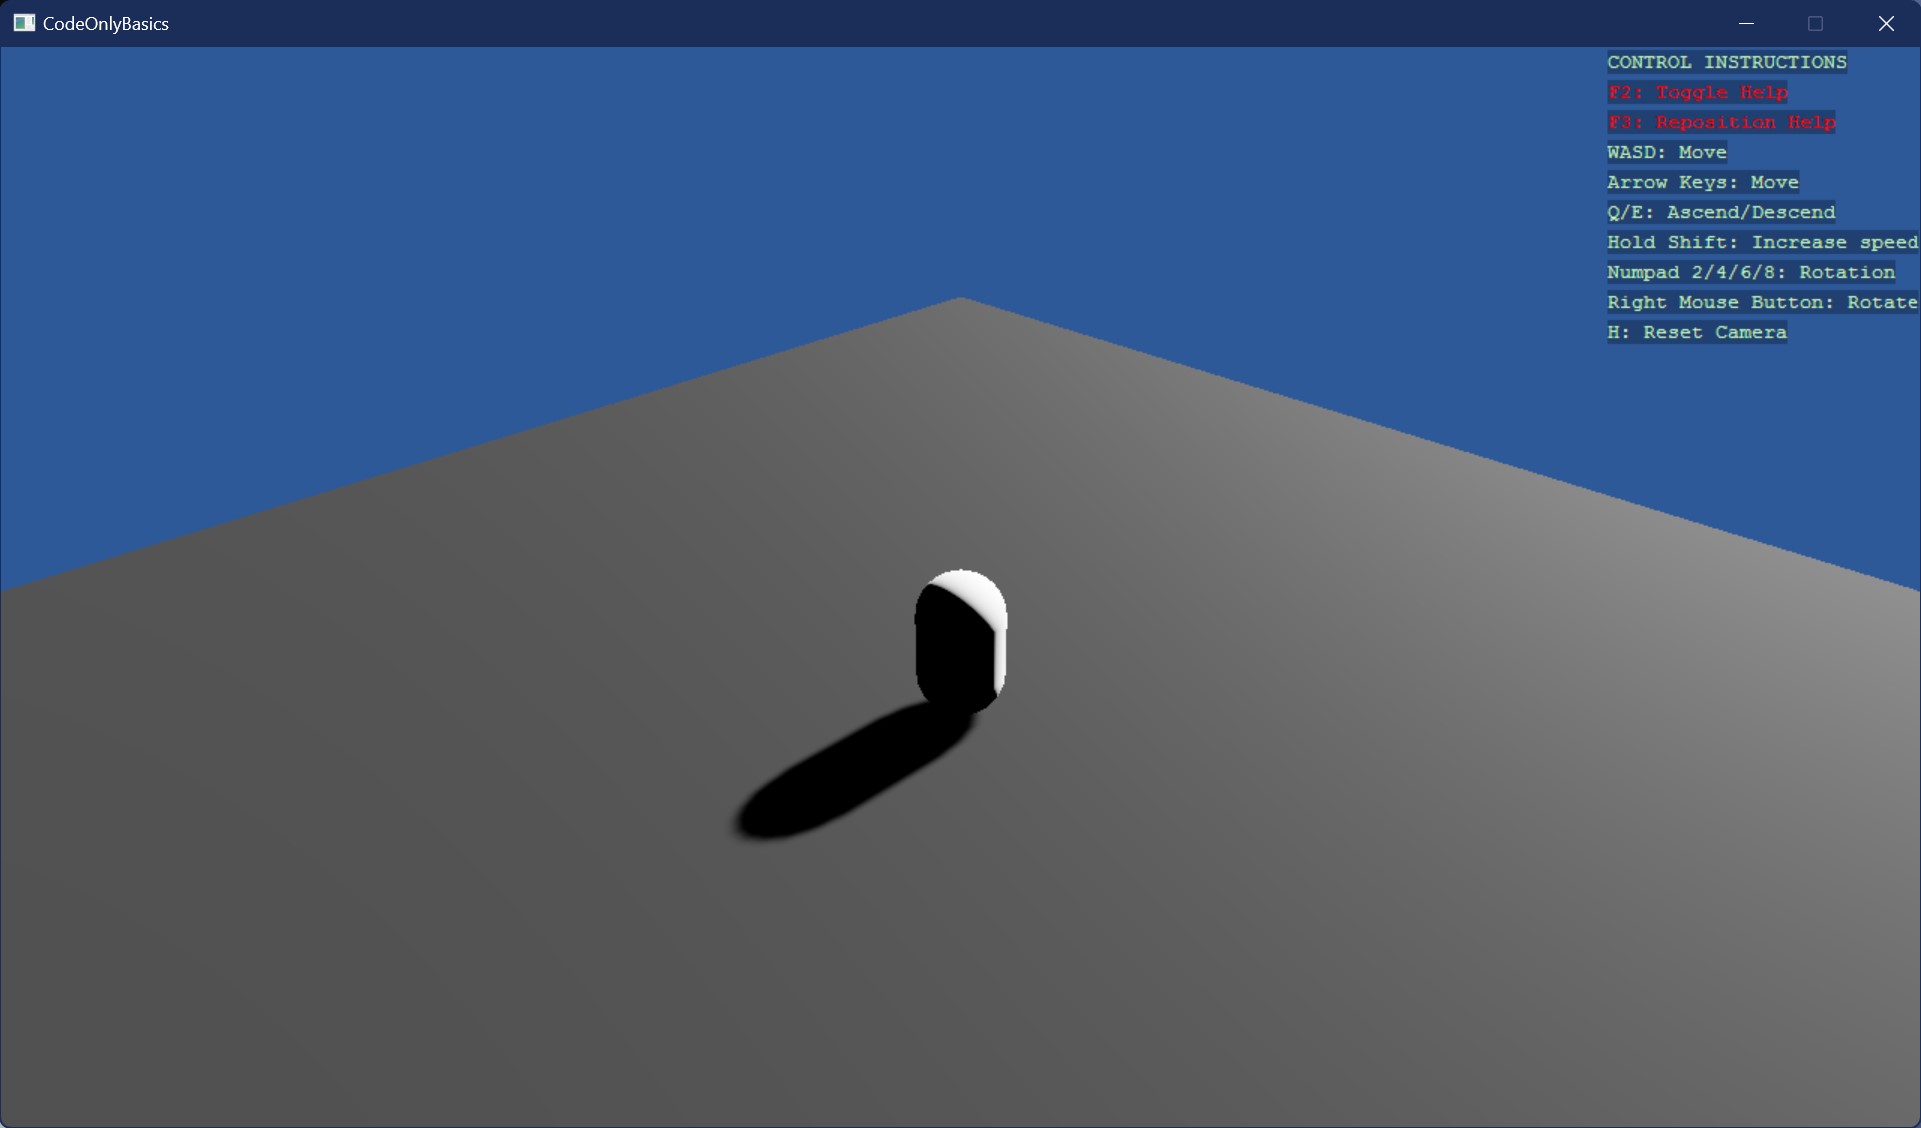
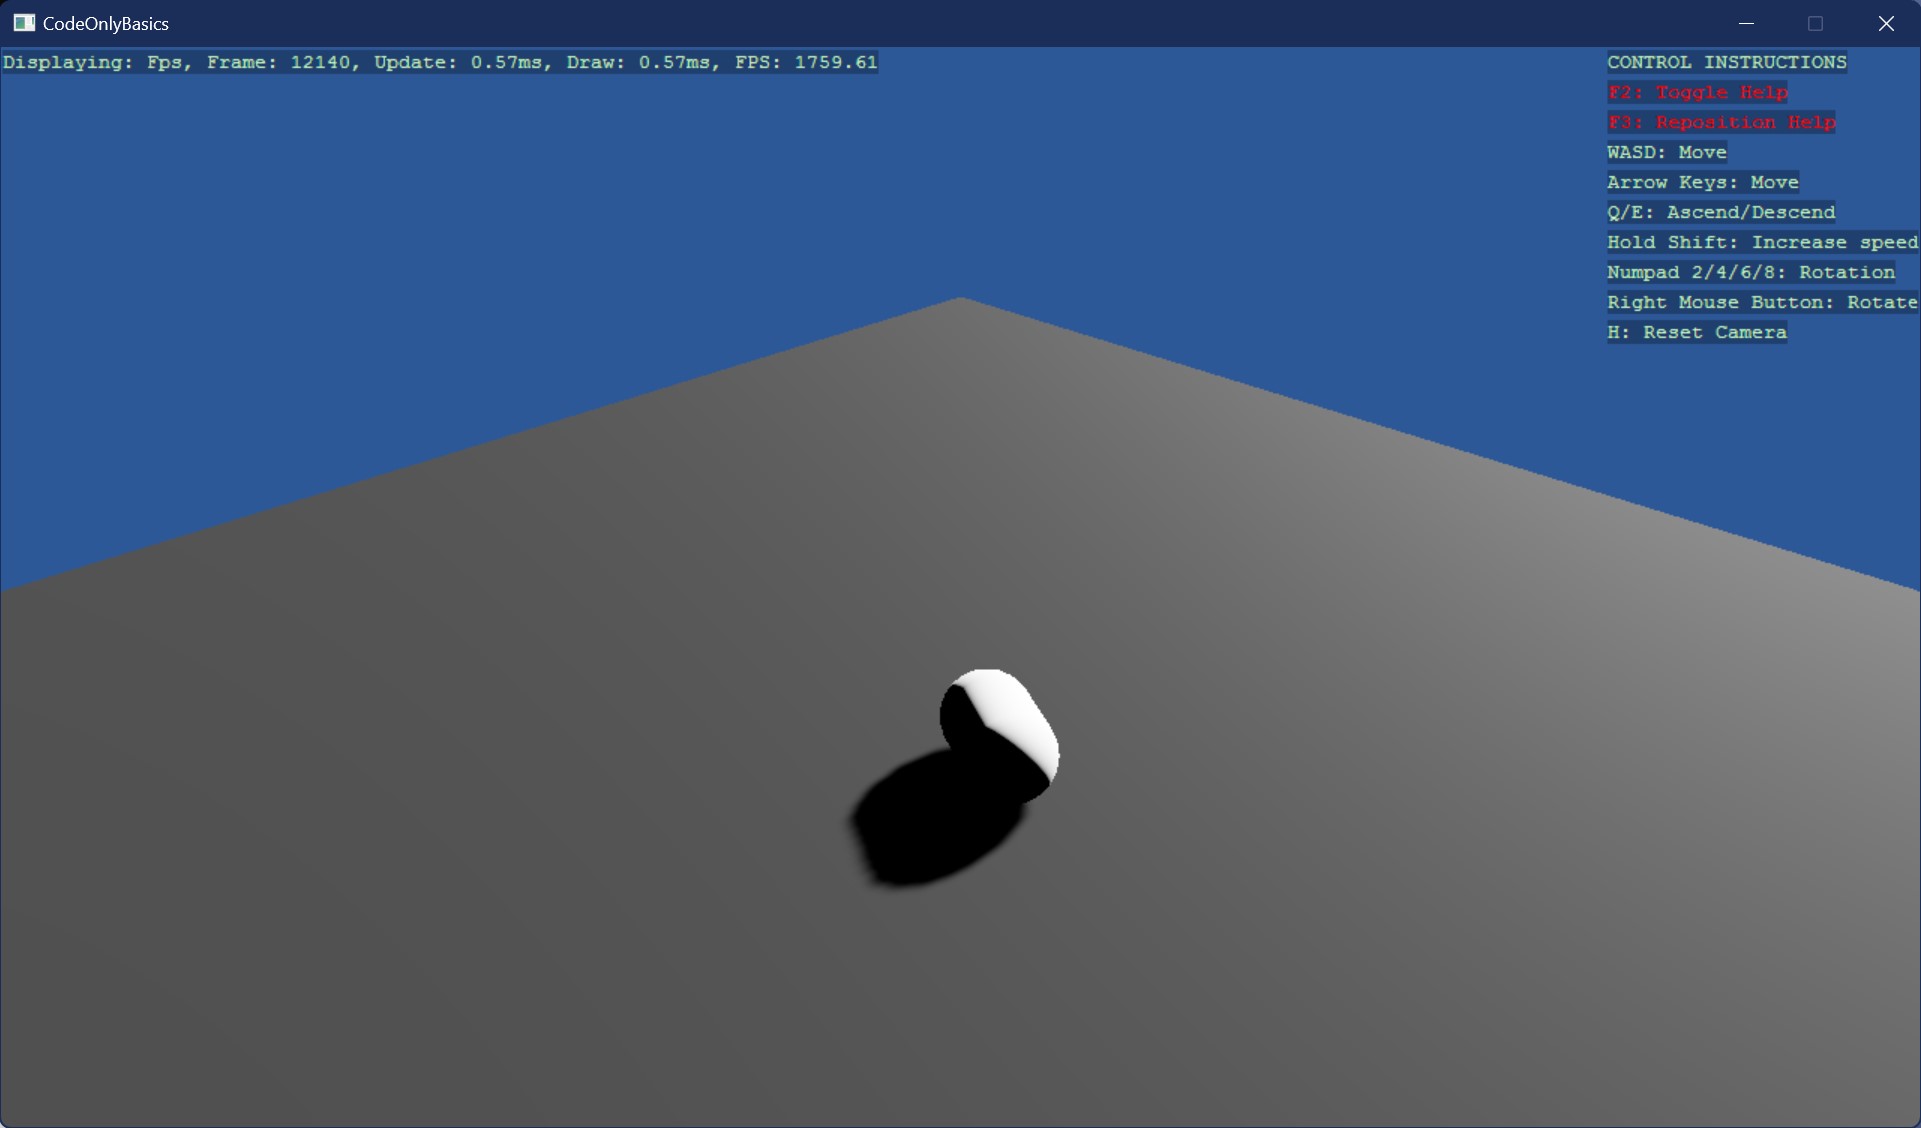
Run the application again. You should see the capsule falling down and landing on the ground. 🎉 Unfortunately, it's still a black capsule on a black ground 🤦♂️. But don't worry, we’ll fix that later! In the meantime, you can move the camera around using the mouse and keyboard (Q or E) to lower or raise the camera and watch the capsule roll around on the ground. 🖱️⌨️
Step 7: Illuminate the Scene - Add Light! 💡 🔗
It's time to brighten things up! Adding some light to the scene will help us see our objects more clearly. Thankfully, there's a helper method called AddDirectionalLight() that adds a directional light to the scene. Update the Start() method to look like this:
// Define the Start method to set up the scene
void Start(Scene scene)
{
// Add the default graphics compositor to handle rendering
game.AddGraphicsCompositor();
// Add a 3D camera and a controller for basic camera movement
game.Add3DCamera().Add3DCameraController();
// Add a directional light to illuminate the scene
game.AddDirectionalLight(); // This was added
// Add a 3D ground plane to catch the capsule
game.Add3DGround();
// Create a 3D primitive capsule and store it in an entity
var entity = game.Create3DPrimitive(PrimitiveModelType.Capsule);
// Reposition the capsule 8 units above the origin in the scene
entity.Transform.Position = new Vector3(0, 8, 0);
// Add the entity to the root scene so it becomes part of the scene graph
entity.Scene = scene;
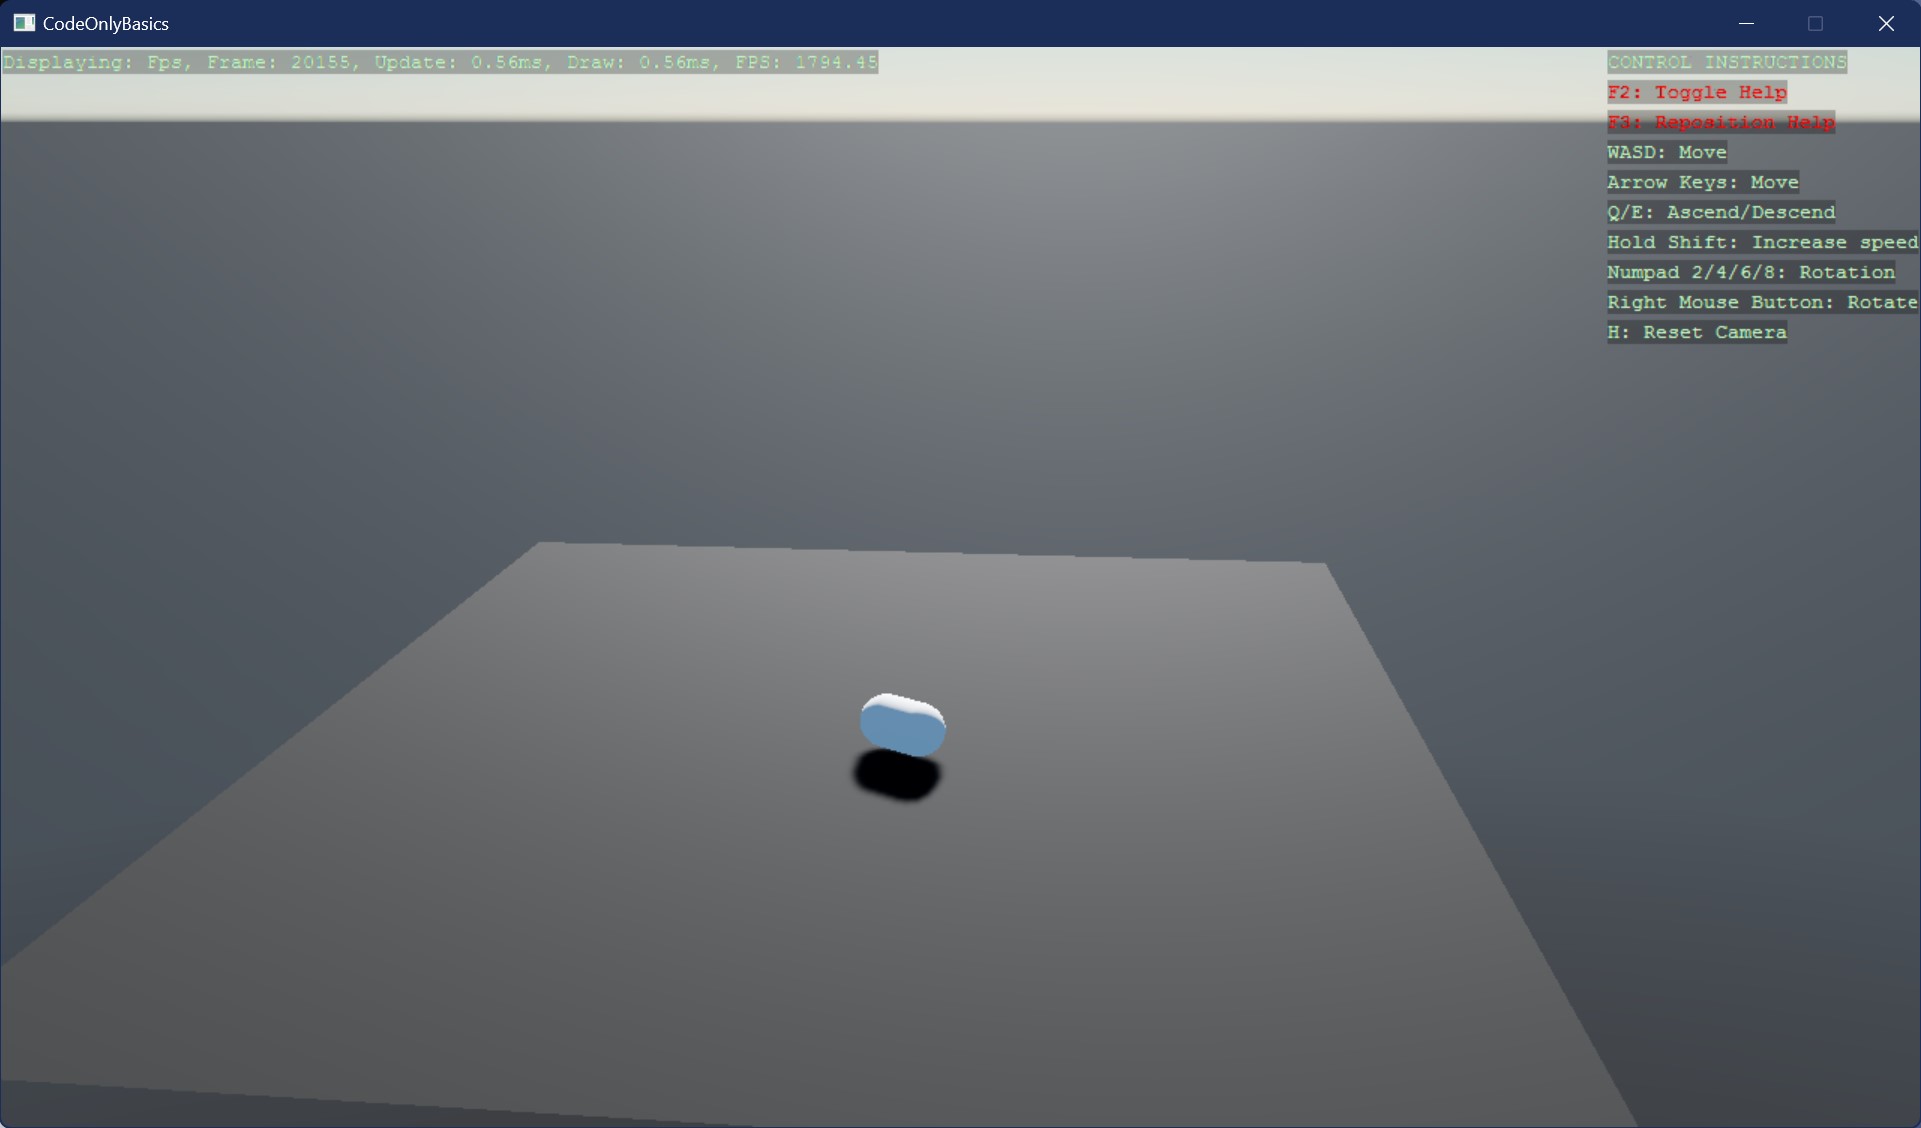
}Run the application again. 🌟 You should now see the capsule falling down and landing on the ground, with everything clearly illuminated by the directional light. The capsule and ground are much easier to see, thanks to the added light shining on the scene. 🎉
Finally, no more black-on-black mysteries! 💡
Step 8: Break 1 - Let's Reflect 😅 🔗
Tedious work, but you just learned the very basics of game setup behind the scenes, which is usually done in the Game Studio for you automatically.
- You need a Graphics Compositor to render the scene
- You need a Camera to view the scene
- You need a Camera Controller to move the camera around. This is a C# script that controls the camera's position and orientation
- You need a Light to illuminate the scene
Once the basics are set up, you need to add entities to the scene. In our example, we added:
- A 3D Ground, a simple primitive model that provides a surface.
- A Capsule, another primitive model, which we’ve repositioned and dropped into the scene.
The toolkit added colliders for the ground and capsule, ensuring that the capsule doesn't fall through the ground but instead interacts realistically with the scene.
Whew! 😅 Take a deep breath, and get ready for the next part of our journey. Up next: performance optimizations and more interactive elements. 🚀
Step 9: Add Profiler - Performance! 📈 🔗
As game developers, we love seeing those sweet FPS numbers! 🎮 The toolkit provides a AddProfiler() method that adds a performance profiler to the game, allowing us to monitor important metrics like frames per second (FPS).
Update the Start() method to look like this:
// Define the Start method to set up the scene
void Start(Scene scene)
{
    // Add the default graphics compositor to handle rendering
    game.AddGraphicsCompositor();

    // Add a 3D camera and a controller for basic camera movement
    game.Add3DCamera().Add3DCameraController();

    // Add a directional light to illuminate the scene
    game.AddDirectionalLight();

    // Add a 3D ground plane to catch the capsule
    game.Add3DGround();

    // Add a performance profiler to monitor FPS and other metrics
    game.AddProfiler(); // This was added

    // Create a 3D primitive capsule and store it in an entity
    var entity = game.Create3DPrimitive(PrimitiveModelType.Capsule);

    // Reposition the capsule 8 units above the origin in the scene
    entity.Transform.Position = new Vector3(0, 8, 0);

    // Add the entity to the root scene so it becomes part of the scene graph
    entity.Scene = scene;
}
Run the application again. You should see profiler text output in the top-left corner of the screen, showing the frames per second (FPS) and other performance metrics. 🚀 Press F1 to cycle through different profiler outputs and monitor various aspects of your game's performance. 📊
Step 10: Illuminate the Scene - Add Skybox! 🌇 🔗
As exciting as things are looking, we can make our scene even better by adding a skybox. A skybox will enhance the overall atmosphere and give our scene a more polished, realistic look. 🌇
The toolkit provides a AddSkybox() method that adds a skybox to the scene. First, we need to add another NuGet package, Stride.CommunityToolkit.Skyboxes, which includes assets required for the skybox.
dotnet add package Stride.CommunityToolkit.Skyboxes --prereleaseThen, update the code to look like this:
using Stride.CommunityToolkit.Bullet;
using Stride.CommunityToolkit.Engine;
using Stride.CommunityToolkit.Rendering.ProceduralModels;
using Stride.CommunityToolkit.Skyboxes;  // This was added: Import skybox helpers
using Stride.Core.Mathematics;
using Stride.Engine;

// Create an instance of the game
using var game = new Game();

// Start the game loop and provide the Start method as a callback
// This method initializes the game, begins running the game loop,
// and starts processing events.
game.Run(start: Start);

// Define the Start method to set up the scene
void Start(Scene scene)
{
    // Add the default graphics compositor to handle rendering
    game.AddGraphicsCompositor();

    // Add a 3D camera and a controller for basic camera movement
    game.Add3DCamera().Add3DCameraController();

    // Add a directional light to illuminate the scene
    game.AddDirectionalLight();

    // Add a 3D ground plane to catch the capsule
    game.Add3DGround();

    // Add a performance profiler to monitor FPS and other metrics
    game.AddProfiler();

    // Add a skybox to enhance the scene's visuals
    game.AddSkybox(); // This was added

    // Create a 3D primitive capsule and store it in an entity
    var entity = game.Create3DPrimitive(PrimitiveModelType.Capsule);

    // Reposition the capsule 8 units above the origin in the scene
    entity.Transform.Position = new Vector3(0, 8, 0);

    // Add the entity to the root scene so it becomes part of the scene graph
    entity.Scene = scene;
}
Run the application again. 🎮 You should now see a beautiful skybox surrounding the scene, making it look more immersive and realistic. 🌅 The skybox is essentially a large, textured 3D model that wraps around the entire scene, providing a visually appealing background. 🌇
Step 11: Add Motion - I like to Move It, Move It! 🕺 🔗
Before we dive into coding, let's take a moment to explore the different ways we can move entities in our scene. In Stride, we can move objects using two main approaches: non-physical movement and physics-based movement. Each method has its strengths and use cases, depending on the type of game or simulation you're creating.
Moving Entities by Changing Their Position Directly (Without Colliders) 🔗
This method involves directly modifying an entity's position in the scene by changing its Transform.Position. It's a straightforward approach that allows you to move objects freely without considering the physics of the environment. Here are some key points to keep in mind:
- Simple Movement: This method is ideal for scenarios where you want to move objects in a controlled manner without requiring interaction with other entities.
- Non-Physical: The entity doesn't respond to gravity, collisions, or any external forces. This makes it perfect for UI elements, floating objects, or objects that need to follow a predefined path.
- No Interaction: By default, the entity won't collide with or interact with other objects in the scene. This can simplify certain game mechanics but also limits realism.
Use cases for non-physical movement include:
- Camera Movement: Moving a camera smoothly around the scene without it being affected by the environment.
- UI Elements: Moving user interface elements, like menus or health bars, without considering collisions.
- Cutscenes or Animations: Predefined animations where objects follow scripted paths.
CollisionHelper for basic interactions. For example, you can check for conditions like BoxIntersectsBox or calculate distances between objects with DistanceBoxBox.
Moving Entities Using Physics (With Colliders) 🔗
This approach leverages Stride's Bullet physics engine to handle movement. By applying forces and impulses to an entity's RigidbodyComponent, we can create realistic interactions that respond to gravity, collisions, and other physical phenomena. Key aspects of this approach include:
- Realistic Movement: Entities move according to the laws of physics, making this method suitable for objects that need to interact with the environment.
- Collisions: The entity will collide with other objects, allowing for dynamic interactions, such as objects bouncing off surfaces or pushing each other.
- Forces: Movement can be influenced by various forces, including gravity, wind, or explosions. This allows for more complex and dynamic gameplay mechanics.
- Physics-Driven Gameplay: This method is ideal for games that rely on physics-based mechanics, such as puzzle games, platformers, or simulations.
Use cases for physics-based movement include:
- Dynamic Objects: Moving objects that need to interact with other entities, like bouncing balls or rolling barrels.
- Character Movement: Characters or vehicles that need to respond to the environment realistically.
- Environmental Interaction: Objects that react to player actions, such as crates that can be pushed or destroyed.
Step 12: Add Motion without Physics - Move the Cube without Colliders 📦 🔗
Let's add a a cube 📦 to the scene! 🎉
We'll start with the first option: moving the cube by directly changing its position. Update the code to look like this or replace the entire file:
using Stride.CommunityToolkit.Bullet;
using Stride.CommunityToolkit.Engine;
using Stride.CommunityToolkit.Rendering.ProceduralModels;
using Stride.CommunityToolkit.Skyboxes;
using Stride.Core.Mathematics;
using Stride.Engine;
using Stride.Games;  // This was added

float movementSpeed = 1f; // This was added
Entity? cube1 = null; // This was added

// Create an instance of the game
using var game = new Game();

// Start the game loop and provide the Start and Update methods as callbacks
// This method initializes the game, begins running the game loop,
// and starts processing events.
game.Run(start: Start, update: Update); // This was updated

// Define the Start method to set up the scene
void Start(Scene scene)
{
    // Add the default graphics compositor to handle rendering
    game.AddGraphicsCompositor();

    // Add a 3D camera and a controller for basic camera movement
    game.Add3DCamera().Add3DCameraController();

    // Add a directional light to illuminate the scene
    game.AddDirectionalLight();

    // Add a 3D ground plane to catch the capsule
    game.Add3DGround();

    // Add a performance profiler to monitor FPS and other metrics
    game.AddProfiler();

    // Add a skybox to enhance the scene's visuals
    game.AddSkybox();

    // Add a ground gizmo to visualize axis directions
    game.AddGroundGizmo(position: new Vector3(-5, 0.1f, -5), showAxisName: true);

    // Create a 3D primitive capsule and store it in an entity
    var entity = game.Create3DPrimitive(PrimitiveModelType.Capsule);

    // Reposition the capsule 8 units above the origin in the scene
    entity.Transform.Position = new Vector3(0, 8, 0);

    // Add the entity to the root scene so it becomes part of the scene graph
    entity.Scene = scene;

    // This was added
    // Create a cube with material, disable its collider, and add it to the scene
    // The cube is hanging in the default position Vector(0,0,0) in the air,
    // well intersecting the ground plane as it is not aware of the ground
    cube1 = game.Create3DPrimitive(PrimitiveModelType.Cube, new()
    {
        Material = game.CreateMaterial(Color.Gold),
        IncludeCollider = false // No collider for non-physical movement
    });
    cube1.Scene = scene;
}

// This was added
// Define the Update method, called every frame to update the game state
void Update(Scene scene, GameTime time)
{
    // Calculate the time elapsed since the last frame for consistent movement
    // This is crucial for frame-independent movement, ensuring consistent
    // behaviour regardless of frame rate.
    var deltaTime = (float)time.Elapsed.TotalSeconds;

    if (cube1 != null)
    {
         // Move the cube along the negative X-axis with frame-independent motion
        cube1.Transform.Position -= new Vector3(movementSpeed * deltaTime, 0, 0);
    }
}movementSpeeddetermines how fast the cube moves.cube1is anEntityobject representing the cube in the scene.game.Run(start: Start, update: Update)now includes theUpdatemethod as a callback for updating the game state every frame.AddGroundGizmo()adds a visual representation of the ground plane and axis directions. Just a visual aid, it doesn't affect the physics of the scene.CreateMaterial()allows you to color the cube (and even the capsule if you want 😉).Update()is a callback method that is called every frame to update the game state.
Run the application. 🏃 You should see a box (cube) moving along the X-axis, without interacting with other entities.
Step 13: Add Motion with Physics - Move the Cube with Colliders! 🧊 🔗
Now that we've moved the cube without colliders, let's dive into the more realistic option: moving the cube using physics. With this approach, the cube will interact with the environment, responding to forces like gravity and colliding with other entities.
Update the code to include physics-based movement or replace the entire file:
using Stride.CommunityToolkit.Bullet;
using Stride.CommunityToolkit.Engine;
using Stride.CommunityToolkit.Rendering.ProceduralModels;
using Stride.CommunityToolkit.Skyboxes;
using Stride.Core.Mathematics;
using Stride.Engine;
using Stride.Games;
using Stride.Physics; // This was added

float movementSpeed = 1f;
float force = 3f; // This was added
Entity? cube1 = null;
Entity? cube2 = null; // This was added

// Create an instance of the game
using var game = new Game();

// Start the game loop and provide the Start and Update methods as callbacks
// This method initializes the game, begins running the game loop,
// and starts processing events.
game.Run(start: Start, update: Update);

// Define the Start method to set up the scene
void Start(Scene scene)
{
    // Add the default graphics compositor to handle rendering
    game.AddGraphicsCompositor();

    // Add a 3D camera and a controller for basic camera movement
    game.Add3DCamera().Add3DCameraController();

    // Add a directional light to illuminate the scene
    game.AddDirectionalLight();

    // Add a 3D ground plane to catch the capsule
    game.Add3DGround();

    // Add a performance profiler to monitor FPS and other metrics
    game.AddProfiler();

    // Add a skybox to enhance the scene's visuals
    game.AddSkybox();

    // Add a ground gizmo to visualize axis directions
    game.AddGroundGizmo(position: new Vector3(-5, 0.1f, -5), showAxisName: true);

    // Create a 3D primitive capsule and store it in an entity
    var entity = game.Create3DPrimitive(PrimitiveModelType.Capsule);

    // Reposition the capsule 8 units above the origin in the scene
    entity.Transform.Position = new Vector3(0, 8, 0);

    // Add the entity to the root scene so it becomes part of the scene graph
    entity.Scene = scene;

    // Create a cube with material, disable its collider, and add it to the scene
    // The cube is hanging in the default position Vector(0,0,0) in the air,
    // well intersecting the ground plane as it is not aware of the ground
    cube1 = game.Create3DPrimitive(PrimitiveModelType.Cube, new()
    {
        Material = game.CreateMaterial(Color.Gold),
        IncludeCollider = false // No collider for simple movement
    });
    cube1.Scene = scene;

    // This was added
    // Create a second cube with a collider for physics-based interaction
    cube2 = game.Create3DPrimitive(PrimitiveModelType.Cube, new()
    {
        Material = game.CreateMaterial(Color.Orange)
    });
    cube2.Transform.Position = new Vector3(-3, 5, 0);  // Reposition the cube above the ground
    cube2.Scene = scene;
}

// Define the Update method, called every frame to update the game state
void Update(Scene scene, GameTime time)
{
    // Calculate the time elapsed since the last frame for consistent movement
    var deltaTime = (float)time.Elapsed.TotalSeconds;

    if (cube1 != null)
    {
        // Move the first cube along the negative X-axis (non-physical movement)
        cube1.Transform.Position -= new Vector3(movementSpeed * deltaTime, 0, 0);
    }

    // This was added
    // Handle physics-based movement for cube2
    if (cube2 != null)
    {
        // Retrieve the RigidbodyComponent, which handles physics interactions
        var rigidBody = cube2.Get<RigidbodyComponent>();

        // Check if cube2 is stationary by verifying if its linear velocity is effectively zero.
        if (Math.Round(rigidBody.LinearVelocity.Length()) == 0)
        {
            // Apply an impulse to cube2 along the X-axis, initiating movement.
            rigidBody.ApplyImpulse(new Vector3(force, 0, 0));

            // Reverse the direction of the impulse for the next impulse,
            // allowing cube2 to move back and forth along the X-axis.
            force *= -1;
        }
    }
}
Stride.Physicsprovides access to physics-related classes and components, including theRigidbodyComponent.forcedetermines the strength of the impulse applied to the cube.cube2is anEntityobject representing the cube that will move using physics-based interactions.RigidbodyComponenthandles physics interactions, allowing the entity to respond to forces, gravity, and collisions.LinearVelocityrepresents the velocity of the cube. We check if the velocity is near zero (indicating the cube is stationary) before applying the impulse.ApplyImpulse()applies a force to the entity, causing it to move in the direction of the applied force. In this case, we’re applying an impulse to the cube, making it move along the X-axis.
Run the application. 🏃♂️ You should now see two cubes in the scene:
- Cube 1 moves along the X-axis using non-physical movement, just like in the previous step.
- Cube 2 interacts with the environment using physics, responding to forces and collisions.
This step introduces a new level of realism by making the cube react to physical forces, adding depth and complexity to your game. 🎮
The main difference between the two cubes is that Cube 1 moves without interacting with the environment. We directly modify the entity's Transform.Position to move it, resulting in simple, non-physical movement. In contrast, Cube 2 responds to physics, collisions, and forces. Instead of manually changing its position, we control its movement through the RigidbodyComponent, which handles all the physics-based interactions, including gravity, impulses, and collisions with other objects in the scene. This makes Cube 2's movement more realistic and reactive to its surroundings.
Step 14: Add Keyboard Interaction - Move the Cube! ⌨️ 🔗
Now it's time to add some interactivity! 🎮 We will update the Update() method to allow the player to move the cubes around using the keyboard. We'll make sure both Cube 1 (non-physical movement) and Cube 2 (physics-based movement) respond to key presses.
Ensure that the using Stride.Input; namespace is included to handle input.
You can replace the existing Update method with the following code:
// Define the Update method, called every frame to update the game state
void Update(Scene scene, GameTime time)
{
    // Calculate the time elapsed since the last frame for consistent movement
    var deltaTime = (float)time.Elapsed.TotalSeconds;

    // This was updated
    // Handle non-physical movement for cube1
    if (cube1 != null)
    {
        // Move the first cube along the negative X-axis when the Z key is held down
        if (game.Input.IsKeyDown(Keys.Z))
        {
            cube1.Transform.Position -= new Vector3(movementSpeed * deltaTime, 0, 0);
        }
        // Move the first cube along the positive X-axis when the X key is held down
        else if (game.Input.IsKeyDown(Keys.X))
        {
            cube1.Transform.Position += new Vector3(movementSpeed * deltaTime, 0, 0);
        }
    }

    // This was updated
    // Handle physics-based movement for cube2
    if (cube2 != null)
    {
        // Retrieve the RigidbodyComponent, which handles physics interactions
        var rigidBody = cube2.Get<RigidbodyComponent>();

        // We use KeyPressed instead of KeyDown to apply impulses only once per key press.
        // This means the player needs to press and release the key to apply an impulse,
        // preventing multiple impulses from being applied while the key is held down.

        // Apply an impulse to the left when the C key is pressed (and released)
        if (game.Input.IsKeyPressed(Keys.C))
        {
            rigidBody.ApplyImpulse(new Vector3(-force, 0, 0));
        }
        // Apply an impulse to the right when the V key is pressed (and released)
        else if (game.Input.IsKeyPressed(Keys.V))
        {
            rigidBody.ApplyImpulse(new Vector3(force, 0, 0));
        }
    }
}game.Input.IsKeyDown()checks if a key is currently held down. This is useful for continuous actions, like moving an object as long as the key is pressed.game.Input.IsKeyPressed()checks if a key was pressed and released once. This is ideal for triggering actions that should only occur once per key press, such as applying an impulse to a physics object, to avoid multiple impulses being applied while the key is held down.
Additional Points:
- The non-physical movement for Cube 1 allows smooth, continuous movement along the X-axis when holding the Z or X keys.
- The physics-based movement for Cube 2 applies an impulse to the cube when the C or V keys are pressed, allowing it to interact with the environment.
- The capsule does not collide with Cube 1 because we disabled the collider for that cube but interacts with Cube 2, which has a collider and responds to physics.
Run the application. You should now be able to control Cube 1's position with the Z and X keys, moving it left and right, and apply impulses to Cube 2 with the C and V keys, pushing it back and forth and colliding with the capsule. 🎮
This step introduces basic keyboard controls, adding interactivity to your scene and allowing the player to manipulate objects in real-time. Ready to add even more interaction? Let's move on to mouse controls next! 🖱️
Step 15: Add Mouse Interaction - Do something! 🖱️ 🔗
Let's add mouse interaction to the scene! 🐭 In this step, we'll update the Update() method to allow players to interact with the cubes and the capsule using the mouse 🖱️. We'll make sure both Cube 1 (non-physical movement), Cube 2, and the capsule (physics-based movement) respond to mouse input.
The previous comments have been streamlined to keep the code clean and focused🧹. Also, make sure you can see your console output to see the results of the mouse interactions.
You can replace the entire code with the following, or refer to the comments labelled // This was added to see the specific changes.
using Stride.CommunityToolkit.Bullet;
using Stride.CommunityToolkit.Engine;
using Stride.CommunityToolkit.Rendering.ProceduralModels;
using Stride.CommunityToolkit.Skyboxes;
using Stride.Core.Mathematics;
using Stride.Engine;
using Stride.Games;
using Stride.Input;
using Stride.Physics;

float movementSpeed = 1f;
float force = 3f;
Entity? cube1 = null;
Entity? cube2 = null;

CameraComponent? camera = null; // This was added: Store the camera component
Simulation? simulation = null; // This was added: Store the physics simulation
ModelComponent? cube1Component = null; // This was added: Store the model component of Cube 1

using var game = new Game();

game.Run(start: Start, update: Update);

void Start(Scene scene)
{
    game.AddGraphicsCompositor();
    game.Add3DCamera().Add3DCameraController();
    game.AddDirectionalLight();
    game.Add3DGround();
    game.AddProfiler();
    game.AddSkybox();
    game.AddGroundGizmo(position: new Vector3(-5, 0.1f, -5), showAxisName: true);

    var entity = game.Create3DPrimitive(PrimitiveModelType.Capsule);
    entity.Transform.Position = new Vector3(0, 8, 0);
    entity.Scene = scene;

    cube1 = game.Create3DPrimitive(PrimitiveModelType.Cube, new()
    {
        Material = game.CreateMaterial(Color.Gold),
        IncludeCollider = false // No collider for simple movement
    });
    cube1.Scene = scene;

    cube2 = game.Create3DPrimitive(PrimitiveModelType.Cube, new()
    {
        Material = game.CreateMaterial(Color.Orange)
    });
    cube2.Transform.Position = new Vector3(-3, 5, 0);
    cube2.Scene = scene;

    // These were added
    // Initialize camera, simulation, and model component for interactions
    camera = scene.GetCamera();
    simulation = game.SceneSystem.SceneInstance.GetProcessor<PhysicsProcessor>()?.Simulation;
    cube1Component = cube1.Get<ModelComponent>();
}

void Update(Scene scene, GameTime time)
{
    var deltaTime = (float)time.Elapsed.TotalSeconds;

    // Handle non-physical movement for cube1
    if (cube1 != null)
    {
        if (game.Input.IsKeyDown(Keys.Z))
        {
            cube1.Transform.Position -= new Vector3(movementSpeed * deltaTime, 0, 0);
        }
        else if (game.Input.IsKeyDown(Keys.X))
        {
            cube1.Transform.Position += new Vector3(movementSpeed * deltaTime, 0, 0);
        }
    }

    // Handle physics-based movement for cube2
    if (cube2 != null)
    {
        var rigidBody = cube2.Get<RigidbodyComponent>();

        if (game.Input.IsKeyPressed(Keys.C))
        {
            rigidBody.ApplyImpulse(new Vector3(-force, 0, 0));
        }
        else if (game.Input.IsKeyPressed(Keys.V))
        {
            rigidBody.ApplyImpulse(new Vector3(force, 0, 0));
        }
    }

    // This was added
    // Ensure camera and simulation are initialized before handling mouse input
    if (camera == null || simulation == null || !game.Input.HasMouse) return;

    // This was added
    // Handle mouse input for interactions
    if (game.Input.IsMouseButtonPressed(MouseButton.Left))
    {
        // Check for collisions with physics-based entities using raycasting
        var hitResult = camera.RaycastMouse(simulation, game.Input.MousePosition);

        if (hitResult.Succeeded)
        {
            var message = $"Hit: {hitResult.Collider.Entity.Name}";
            Console.WriteLine(message);

            var rigidBody = hitResult.Collider.Entity.Get<RigidbodyComponent>();

            if (rigidBody != null)
            {
                var direction = new Vector3(0, 3, 0); // Apply impulse upward

                rigidBody.ApplyImpulse(direction);
            }
        }
        else
        {
            Console.WriteLine("No hit detected.");
        }

        // Check for intersections with non-physical entities using ray picking
        var ray = camera.GetPickRay(game.Input.MousePosition);

        if (cube1Component?.BoundingBox.Intersects(ref ray) ?? false)
        {
            Console.WriteLine("Cube 1 hit!");
        }
    }
}camerastores the camera component for raycasting and ray picking.simulationstores the physics simulation for handling interactions.cube1Componentstores the model component of Cube 1 for detecting intersections with the mouse ray.camera.RaycastMouse()detects collisions with physics-based entities using raycasting.camera.GetPickRay()checks for intersections with non-physical entities using ray picking.
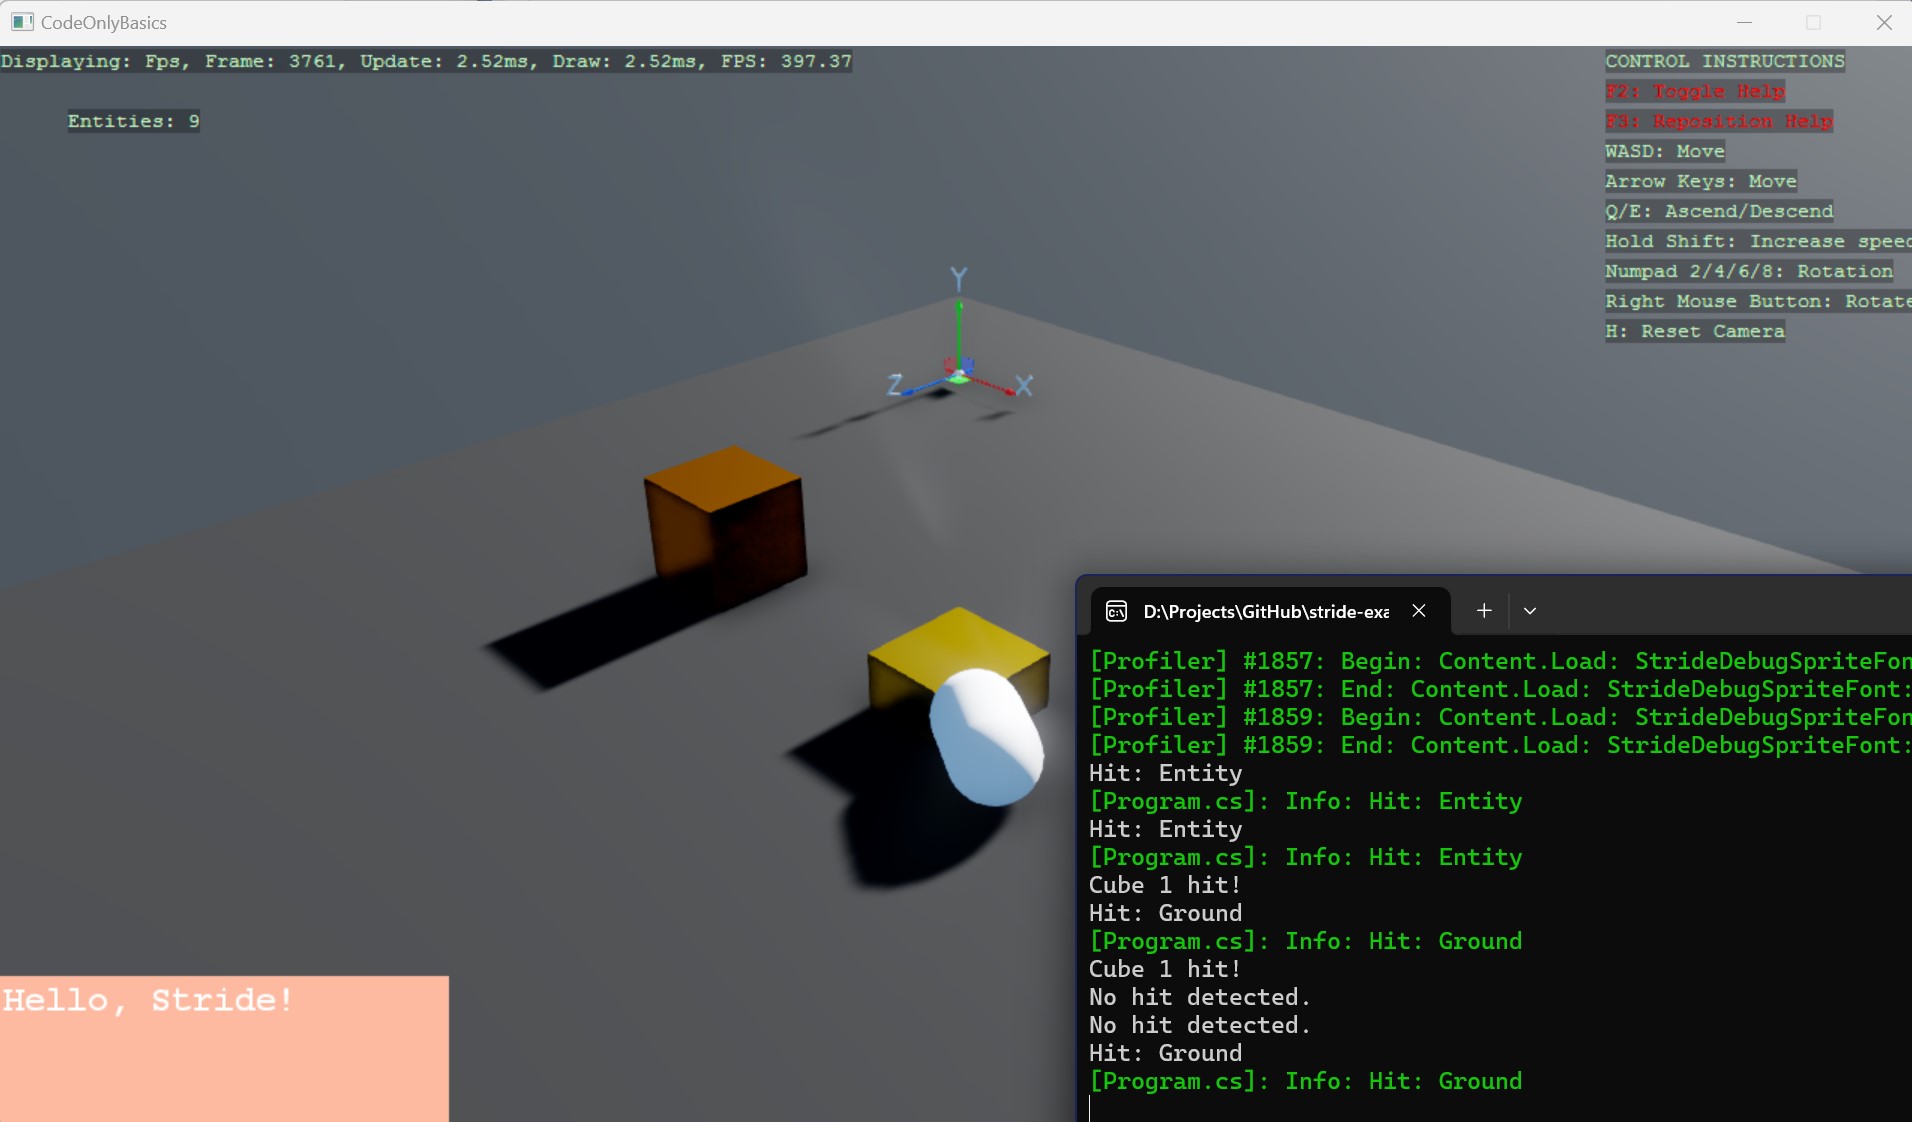
Now, when you click the left mouse button, the application will respond with the following actions depending on where you click:
- Clicking Outside the Ground: If you click anywhere in the scene that doesn't intersect with an object or the ground, it will print "No hit detected." This indicates that the mouse ray didn't collide with any entities.
- Clicking on Cube 1: Since Cube 1 doesn't have a collider, two things will happen:
- The raycast will pass through Cube 1 and hit the ground beneath it, printing "Hit: Ground."
- Additionally, the ray-picking method will detect that Cube 1 was hit, and it will print "Cube 1 hit!"
- Clicking on Cube 2: Cube 2 has a collider, so the raycast will detect the collision and print "Hit: Entity." An impulse will be applied to Cube 2, causing it to move upward in response to the click.
- Clicking on the Capsule: Similar to Cube 2, clicking on the capsule will print "Hit: Entity," and an upward impulse will be applied, making the capsule move.
- Clicking on the Ground: If you click directly on the ground, the raycast will detect it and print "Hit: Ground." However, the ground will remain stationary because it has a
StaticColliderComponent, meaning it's a fixed object in the scene.
Nice job! You’ve now implemented mouse interaction, which adds a whole new level of interactivity to the game. 🚀 You can now click on objects in the scene to trigger different actions, like moving cubes or capsules with physics or detecting hits on non-physical entities. This opens up endless possibilities for gameplay mechanics! 🎮 We rock! 🤘
Step 16: Add Output - Console or Screen! 📺 🔗
In this part, we’ll explore basic output options, both to the console and directly on the screen. You’ve already added simple text output using Console.WriteLine() to display interactions when an entity is hit by the mouse raycast. Now, let's expand on this to better visualize interactions and provide feedback to the player.
Output Options 🔗
We have several options for displaying output:
- Console Output: Useful for debugging and logging information. This is great for developers to see real-time feedback and troubleshoot the game
- We can use traditional
Console.WriteLine() - We can also use Stride's
GlobalLogger.GetLogger(), or theLogproperty when used from within a game script
- We can use traditional
- Debug Text Output: Display text directly in the game window, which is useful for quick, in-game debugging
- UI Elements: Create UI elements like text labels or buttons to display information to the player within the game world.
Updating the Console Output 🔗
Let’s update the if (hitResult.Succeeded) {} block by adding two lines to include additional output options:
if (hitResult.Succeeded)
{
    var message = $"Hit: {hitResult.Collider.Entity.Name}";
    Console.WriteLine(message);
    GlobalLogger.GetLogger("Program.cs").Info(message); // This was added
    game.DebugTextSystem.Print($"Entities: {scene.Entities.Count}", new Int2(50, 50)); // This was added

    var rigidBody = hitResult.Collider.Entity.Get<RigidbodyComponent>();

    if (rigidBody != null)
    {
        var direction = new Vector3(0, 3, 0); // Apply impulse upward

        rigidBody.ApplyImpulse(direction);
    }
}
Run the application. You should see additional output in the console window when you click around, highlighted in green by GlobalLogger. However, the text in the game window may flash briefly, as it’s being overwritten every frame.
Moving Output to the Screen 🔗
To keep the text on the screen, move the game.DebugTextSystem.Print() call to the beginning of the Update() method:
void Update(Scene scene, GameTime time)
{
    // This was moved
    game.DebugTextSystem.Print($"Entities: {scene.Entities.Count}", new Int2(50, 50));

    var deltaTime = (float)time.Elapsed.TotalSeconds;

    // Handle non-physical movement for cube1
    if (cube1 != null)
    {
        if (game.Input.IsKeyDown(Keys.Z))
        {
            cube1.Transform.Position -= new Vector3(movementSpeed * deltaTime, 0, 0);
        }
        else if (game.Input.IsKeyDown(Keys.X))
        {
            cube1.Transform.Position += new Vector3(movementSpeed * deltaTime, 0, 0);
        }
    }

    // Handle physics-based movement for cube2
    if (cube2 != null)
    {
        var rigidBody = cube2.Get<RigidbodyComponent>();

        if (game.Input.IsKeyPressed(Keys.C))
        {
            rigidBody.ApplyImpulse(new Vector3(-force, 0, 0));
        }
        else if (game.Input.IsKeyPressed(Keys.V))
        {
            rigidBody.ApplyImpulse(new Vector3(force, 0, 0));
        }
    }

    if (camera == null || simulation == null || !game.Input.HasMouse) return;

    if (game.Input.IsMouseButtonPressed(MouseButton.Left))
    {
        // Check for collisions with physics-based entities using raycasting
        var hitResult = camera.RaycastMouse(simulation, game.Input.MousePosition);

        if (hitResult.Succeeded)
        {
            var message = $"Hit: {hitResult.Collider.Entity.Name}";
            Console.WriteLine(message);
            GlobalLogger.GetLogger("Program.cs").Info(message);

            var rigidBody = hitResult.Collider.Entity.Get<RigidbodyComponent>();

            if (rigidBody != null)
            {
                var direction = new Vector3(0, 3, 0); // Apply impulse upward

                rigidBody.ApplyImpulse(direction);
            }
        }
        else
        {
            Console.WriteLine("No hit detected.");
        }

        // Check for intersections with non-physical entities using ray picking
        var ray = camera.GetPickRay(game.Input.MousePosition);

        if (cube1Component?.BoundingBox.Intersects(ref ray) ?? false)
        {
            Console.WriteLine("Cube 1 hit!");
        }
    }
}
Now, when you run the application, the text "Entities:" should remain visible on the screen at position (50, 50). This gives us some basic screen output! 📺 But since this output is more suited for debugging, let’s explore adding more polished UI elements.
Update() and find out why is that 😯.Adding UI Elements 🔗
Let’s create a simple text block on the canvas to display information to the player.
Replace your current code with this or refer to the comments labelled // This was added to see the specific changes.
using Stride.CommunityToolkit.Bullet;
using Stride.CommunityToolkit.Engine;
using Stride.CommunityToolkit.Rendering.Compositing; // This was added
using Stride.CommunityToolkit.Rendering.ProceduralModels;
using Stride.CommunityToolkit.Skyboxes;
using Stride.Core.Diagnostics;
using Stride.Core.Mathematics;
using Stride.Engine;
using Stride.Games;
using Stride.Graphics; // This was added
using Stride.Input;
using Stride.Physics;
using Stride.Rendering; // This was added
using Stride.UI; // This was added
using Stride.UI.Controls; // This was added
using Stride.UI.Panels; // This was added

float movementSpeed = 1f;
float force = 3f;
Entity? cube1 = null;
Entity? cube2 = null;

CameraComponent? camera = null;
Simulation? simulation = null;
ModelComponent? cube1Component = null;

SpriteFont? font = null; // This was added

using var game = new Game();

game.Run(start: Start, update: Update);

void Start(Scene scene)
{
    game.AddGraphicsCompositor().AddCleanUIStage(); // This was updated
    game.Add3DCamera().Add3DCameraController();
    game.AddDirectionalLight();
    game.Add3DGround();
    game.AddProfiler();
    game.AddSkybox();
    game.AddGroundGizmo(position: new Vector3(-5, 0.1f, -5), showAxisName: true);

    var entity = game.Create3DPrimitive(PrimitiveModelType.Capsule);
    entity.Transform.Position = new Vector3(0, 8, 0);
    entity.Scene = scene;

    cube1 = game.Create3DPrimitive(PrimitiveModelType.Cube, new()
    {
        Material = game.CreateMaterial(Color.Gold),
        IncludeCollider = false // No collider for simple movement
    });
    cube1.Scene = scene;

    cube2 = game.Create3DPrimitive(PrimitiveModelType.Cube, new()
    {
        Material = game.CreateMaterial(Color.Orange)
    });
    cube2.Transform.Position = new Vector3(-3, 5, 0);
    cube2.Scene = scene;

    camera = scene.GetCamera();
    simulation = game.SceneSystem.SceneInstance.GetProcessor<PhysicsProcessor>()?.Simulation;
    cube1Component = cube1.Get<ModelComponent>();

    // This below was added: Create and display a UI text block
    font = game.Content.Load<SpriteFont>("StrideDefaultFont");
    var canvas = new Canvas
    {
        Width = 300,
        Height = 100,
        BackgroundColor = new Color(248, 177, 149, 100),
        HorizontalAlignment = HorizontalAlignment.Left,
        VerticalAlignment = VerticalAlignment.Bottom,
    };

    canvas.Children.Add(new TextBlock
    {
        Text = "Hello, Stride!",
        TextColor = Color.White,
        Font = font,
        TextSize = 24,
        Margin = new Thickness(3, 3, 3, 0),
    });

    var uiEntity = new Entity
    {
        new UIComponent
        {
            Page = new UIPage { RootElement = canvas },
            RenderGroup = RenderGroup.Group31
        }
    };

    uiEntity.Scene = scene;
}

void Update(Scene scene, GameTime time)
{
    game.DebugTextSystem.Print($"Entities: {scene.Entities.Count}", new Int2(50, 50));

    var deltaTime = (float)time.Elapsed.TotalSeconds;

    // Handle non-physical movement for cube1
    if (cube1 != null)
    {
        if (game.Input.IsKeyDown(Keys.Z))
        {
            cube1.Transform.Position -= new Vector3(movementSpeed * deltaTime, 0, 0);
        }
        else if (game.Input.IsKeyDown(Keys.X))
        {
            cube1.Transform.Position += new Vector3(movementSpeed * deltaTime, 0, 0);
        }
    }

    // Handle physics-based movement for cube2
    if (cube2 != null)
    {
        var rigidBody = cube2.Get<RigidbodyComponent>();

        if (game.Input.IsKeyPressed(Keys.C))
        {
            rigidBody.ApplyImpulse(new Vector3(-force, 0, 0));
        }
        else if (game.Input.IsKeyPressed(Keys.V))
        {
            rigidBody.ApplyImpulse(new Vector3(force, 0, 0));
        }
    }

    if (camera == null || simulation == null || !game.Input.HasMouse) return;

    if (game.Input.IsMouseButtonPressed(MouseButton.Left))
    {
        // Check for collisions with physics-based entities using raycasting
        var hitResult = camera.RaycastMouse(simulation, game.Input.MousePosition);

        if (hitResult.Succeeded)
        {
            var message = $"Hit: {hitResult.Collider.Entity.Name}";
            Console.WriteLine(message);
            GlobalLogger.GetLogger("Program.cs").Info(message);

            var rigidBody = hitResult.Collider.Entity.Get<RigidbodyComponent>();

            if (rigidBody != null)
            {
                var direction = new Vector3(0, 3, 0); // Apply impulse upward

                rigidBody.ApplyImpulse(direction);
            }
        }
        else
        {
            Console.WriteLine("No hit detected.");
        }

        // Check for intersections with non-physical entities using ray picking
        var ray = camera.GetPickRay(game.Input.MousePosition);

        if (cube1Component?.BoundingBox.Intersects(ref ray) ?? false)
        {
            Console.WriteLine("Cube 1 hit!");
        }
    }
}fontstores theSpriteFontused for the UI text block.AddCleanUIStage()adds a clean UI stage to the graphics compositor, allowing UI elements to be displayed on top of the 3D scene.game.Content.Load<SpriteFont>()loads the default font for the UI text block.Canvasis a UI panel that acts as a container for UI elements.TextBlockis a UI element that displays text on the screen.UIComponentis a component that manages UI elements in the scene.UIPageis a UI page that contains the root element of the UI hierarchy.RenderGroup.Group31specifies the rendering order of the UI element, ensuring it appears on top of other elements.
Save and run the application. You should now see the text "Hello, Stride!" displayed at the bottom left corner of the screen. 📺
AddCleanUIStage() .Congratulations! 🎉 You've successfully added output to the screen, using both simple debugging text and a more polished UI element. This visual feedback enhances the player experience by providing real-time information and interactions. 🚀
Step 17: Break 2 - Let's Reflect 😅 🔗
Time for a quick reflection on what we've achieved in the last few steps. We've significantly expanded our game's functionality and interactivity. Here's a recap:
- Performance Monitoring: We added a profiler to monitor key metrics like FPS, helping optimize performance for a smoother experience. You also learned how to toggle through profiler outputs to track different aspects of the game. 🚀
- Enhanced Visuals: By adding a skybox, we made the scene more immersive, creating a polished and professional look. 🎨
- Understanding Motion: We explored the difference between non-physical and physics-based movement, learning how to decide which method to use based on game mechanics. 🧠
- Non-Physical Movement: You learned how to move entities using
Transform.Positionwithout interacting with other objects. This approach is great for UI elements or simple animations. 🚶♂️ - Physics-Based Movement: By applying forces to entities via
RigidbodyComponent, we introduced realistic interactions with gravity and collisions, adding depth to the gameplay. ⚙️ - Keyboard Controls: We implemented basic keyboard inputs to move entities, adding interactivity and responsiveness to the game. 🎮
- Mouse Controls: We extended player interaction by integrating mouse clicks, allowing players to trigger actions like applying forces to entities. 🖱️
- Displaying Output: Finally, we explored output options, from console logs to UI elements, enhancing player feedback and communication. 📊
- Entities Count: While debugging, you discovered that an entity can be added to the scene without necessarily having a visual representation. You also learned that the camera, light, game profiler, and skybox are all entities as well. 🤯
Step 18: Add More Primitives - Let's go crazy! 🤪 🔗
Two boxes 📦🧊 and a capsule 💊? That's not enough fun! I didn't sign up for just that! Let's crank it up and add more shapes to the scene!
To do this, add the following code inside the Update() method, below the if (cube2 != null) {} block:
if (game.Input.IsKeyDown(Keys.Space))
{
    var entity = game.Create3DPrimitive(PrimitiveModelType.Cube, new()
    {
        Material = game.CreateMaterial(Color.Green),
        Size = new Vector3(0.5f),
    });

    entity.Transform.Position = VectorHelper.RandomVector3(
        xRange: [-3, 3],
        yRange: [10, 13],
        zRange: [-3, 3]
    );
    entity.Scene = scene;
}
Now, run the application, zoom out the camera to view the entire ground, and press the Space key. Watch as new cubes spawn, pushing your FPS to its limits! 🚀 You can still use the left mouse button to apply forces to the cubes and the capsule, but that’s getting a bit old, isn’t it? 🥱
Let's spice things up with more mouse interaction, this time using the middle mouse button. Firstly add this namespace using Stride.CommunityToolkit.Helpers; and then add the following code inside the Update() method, just below the line if (camera == null || simulation == null || !game.Input.HasMouse) return;:
 if (game.Input.IsMouseButtonDown(MouseButton.Middle))
 {
     var hitResult = camera.RaycastMouse(simulation, game.Input.MousePosition);

     if (hitResult.Succeeded)
     {
         var rigidBody = hitResult.Collider.Entity.Get<RigidbodyComponent>();

         if (rigidBody != null)
         {
             var direction = VectorHelper.RandomVector3([-20, 20], [0, 20], [-20, 20]);

             rigidBody.ApplyImpulse(direction);
         }
     }
 }
The final code is also available on GitHub.
Run the application, and now, whenever you click the middle mouse button on an object, it will get a random impulse in a random direction. 🎲 How cool is that?
Wrapping Up: Your Journey Continues 🎯 🔗
Congratulations, explorer! 🎉 You've navigated through another significant chapter in your game development journey. 🌍 In this part, you delved deeper into interactivity, mastering how to implement mouse and keyboard controls to make your game more dynamic and engaging.
What You've Achieved 🔗
By adding mouse interactions, you’ve empowered players to directly interact with objects in your scene using techniques like raycasting and ray picking. Combined with the keyboard controls you implemented earlier, your game now responds to player inputs, allowing for real-time movement, actions, and feedback. 🖱️⌨️
The Power of Interactivity 🔗
Interactivity is at the heart of game design. By giving players the ability to influence the game world, you create a more immersive and engaging experience. The skills you've developed—handling inputs, moving objects, managing physics, and providing feedback—are foundational to building more complex and polished games. 🌟
If you'd like to explore the final code for this project, you can access it on GitHub. Feel free to check it out and experiment! 💻
Follow-Up Articles 🚶 🔗
In the not-so-distant future, we will cover the following topics in Bepu Physics:
- Stride Community Toolkit Preview - Code-Only Feature - Advanced: Let's get creative and explore more advanced features to take your game to the next level. 🚀
- Maximize the game window
- Setting the Game Window Title
- Hot reload
- Removing entities from the scene
- Entities vs Children vs Components
- Interaction with the UI and from the UI
- Transforming entities
- Advanced physics interactions
- Audio and sound effects
- Particle effects
- Stride Community Toolkit Preview - Code-Only Feature - Refactoring: Let's refactor the code to make it more modular, reusable, and maintainable. 🛠️
- Or in other words, let’s clean up the mess we made! 😅
Support Stride Engine 🌟 🔗
Stride is an open-source project that thrives on community contributions and support. By using Stride, sharing your experiences, and contributing to the community, you help make the engine better for everyone. 🚀
- Contribute: Share your knowledge, contribute to the engine, or report issues to help improve Stride for all developers.
- Join the Community: Engage with fellow developers, ask questions, and showcase your projects on our Discord server or in GitHub Discussions.
- Sponsor: Support the continued development of Stride by becoming a sponsor on our Open Collective page.
C#Stride3D.NETGame DevelopmentAdvanced
Any comments? You can start 🗨 at GitHub Discussions. Edit this page on .